Showing posts with label simple meal. Show all posts

Wednesday, February 15, 2012

Green Onion Pancakes 蔥油餅

From when I was small my grandma would occasionally make green onion pancakes, otherwise known as scallion pancakes 蔥油餅.  I really enjoyed eating the pancakes.
 
I was always interested in trying out this recipe and I got the chance when there was a potluck at my youth fellowship.  This is a post from a really long time ago, by the way.  I'm going to post about 11 items soon, but I'm getting this out of the way first.

My best friend was there when I made it and she really liked the end result.  I honestly don't remember too much about the tastes, but I think this recipe is worth making.  The only adjustment I would make is not use as much oil.

Green Onion Pancakes 蔥油餅 

Photobucket

Friday, February 10, 2012

Pan Pizza


After a long time of having this pizza in my to-do list, I can finally cross it off.  I have always wanted to try making some pizza, but I never got the chance until my mom's off day (the day she takes a break from cooking).  

The pizza was really easy to make and it reminded me of Pizza Hut's pizza. It had a nice crispy crust that tasted just right, due to the generously greased pans.   If you had a tiring day, you can make this pizza for an easy dinner.  I actually got the recipe from my book, America's Test Kitchen Family Baking Book.  The recipe also happens to be the same one that Tracey from Tracey's Culinary Adventures used.


Pepperoni Pan Pizza

Photobucket
Photobucket 

Photobucket

Photobucket

Friday, August 19, 2011

Fettucine Alfredo

One day my mom didn't know what she should make for lunch, and we happened to be at Trader Joe's. I knew that my brother had been craving fettucine alfredo, so I decided to try making it myself. Instead of using fettucine, I ended up using linguine because I couldn't find it. These noodles are really easy to cook. All you have to do is melt the ingredients together and then mix it with the noodles and you're done. My brother liked it, except he thought it should have a bit more taste. I think he also thought that there was too much sauce. I kind of forgot because this was a few months ago.

Fettucine Alfredo
Recipe from Pioneer Woman.

Photobucket

Tuesday, July 26, 2011

Spam Musubi

Hi everyone, I'm still alive. Sorry for being such a bad blogger recently. I decided to take a very short break back in June...and it turned into a two month break! I didn't feel motivated/patient enough to blog, but now I'm back. I'll tell you what happened these past couple of months in more detail another day.

Here's something that I learned how to make in a cooking class, the beginning of freshmen year, or more specifically, the summer before. I learned that spam was a solid chunk of meat. Before, I had always believed that spam was some type of veggie. Anyway, I finally made this again after a few years. I made this with my friend J. We had a great time making it. It's a very simple recipe and delicious too.

Spam Musubi
Photobucket

Photobucket
Ingredients for one spam musubi
1 strip of nori seaweed
Cooked rice
1 slice spam
Furukaki powder to taste
Musubi maker
Musubi Cooking Sauce
2 tbsp soy sauce
2 tbsp sugar
2 tbsp mirin (rice wine)

Directions
Mix the soy sauce, sugar, and mirin in a small pan or pot and heat, stirring until it comes just to a boil. Keep it warm at low heat.
Photobucket

Photobucket
Slice the spam however thick you want it.
Photobucket
Fry the spam slices in a little oil in a skillet. Once slightly browned, soak spam in musubi sauce.

Photobucket

Musubi Assembly
Line a musubi maker with nori so that both ends stick straight up out of it.
Put a ¼” layer of rice on tope of the nori that is in the maker.
Photobucket
My friend J. puts the rice on the seaweed.

Sprinkle a dash of furukaki powder on the rice. Lay one slice of spam on top of that layer.
Photobucket
Spread another ¼” layer of rice on top of the spam. Add another dash of furukaki on top of the rice. Fold over one flap of nori. Use the musubi maker “pusher” to press down on top of the nori wrapping the rice and spam. Fold over the other flap, press down again. Remove the musubi and enjoy!

Photobucket

Notes:
1. The extra sauce can be reserved and used as a dipping sauce.
2. The nori seaweed may need to be cut into two pieces. Make it so that the it will fit the length of the spam.

Monday, March 14, 2011

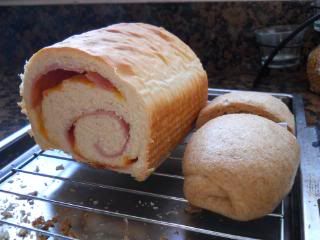
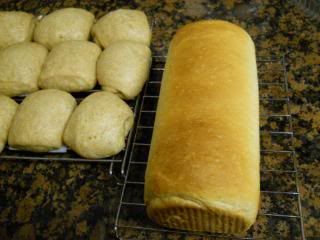
Wheat Mantou II and Ham and Cheese Bread

I haven't felt like blogging recently, but I still bake a lot. So now I have lots of posts that I still need to write. Anyway....

I wanted to try replicating this Chinese supermarket's mantou because I really like their mantou's texture. It's soft and you can eat it layer by layer. I always love peeling off the mantou skin and eating that first before peeling off layers of the mantou and eating it bit by bit. Is that weird? :D So because I wanted soft, layered mantou, I tried making wheat mantou again by adapting the recipe I previously used.

Sorry the picture is a bit washed out.
Photobucket

Photobucket
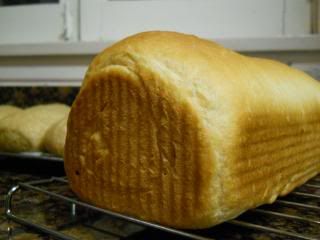
My bread tin has some grooves, so the bread has these cool looking lines.
Photobucket

Sunday, March 6, 2011

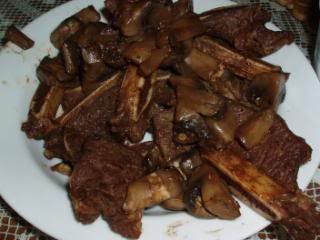
小 牛牌 Little Ribs

When I was little, my mom would cook this pretty often. However, now we only eat this once in a while. The ingredients below are estimates because my mom adds ingredients by eying the amount, not measuring like me. Hopefully, I will learn how to cook one day without measuring ingredients. Sorry, but I don't know the English name for this dish...so my translation may sound a bit weird.

小牛牌 Little Ribs
Recipe from my mom
Photobucket
some ribs
BBQ sauce or black pepper sauce -2-3-4 tbsps
Soy sauce around 1 tbsp or more, depending on the amount of meat

Directions
Cut ribs, get rid of the fat by peeling it off. If there is too much fat, cut it off with a knife.

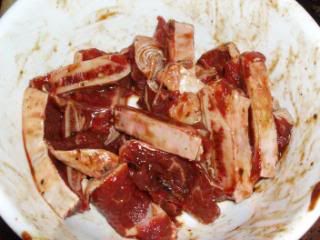
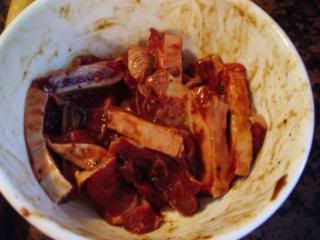
Marinate the ribs for around 30 minutes in the BBQ sauce or black pepper sauce. Use enough sauce to marinate all the meat.
Photobucket

Photobucket
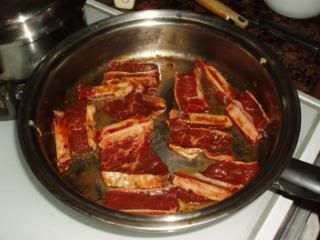
When cooking it, no oil is needed for the pan because there will be a lot of fat coming out.

Add the meat to the pan by laying it on its side. Cook on medium heat for a few minutes so the meat won't become tough.
Cook on one side for a few minutes, then flip over to the other side.
Photobucket
Then cover the pan with the lid, checking from time to time to see when it is done on that one side. After it is done on that side, flip it over to continue cooking. This will only take a few minutes and then you're done!


The remaining sauce leftover from this dish is good for noodles. Just cook and drain the noodles, then mix the sauce with the noodles.

Btw, these pictures were taken with the old camera, before it died.

Tuesday, July 20, 2010

Chicken Quesadillas

The first time I ever made quesadillas was during the summer before freshmen year in high school. I was taking a cooking class at my high school for summer school. In that class, I learned how to make several new things and I discovered a new food that I had never heard of before and that food is one of my favorites now (spam musubi). I'll share the recipe another time, when I get to make it. But today, I have the quesadilla recipe. Actually, my brother made these for Father's Day and I helped (to his annoyance b/c I became too bossy). He's currently taking the cooking class and I think he enjoys it.


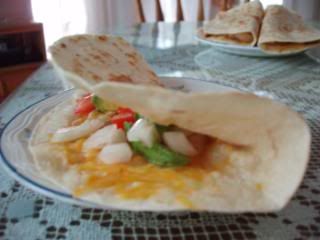
Chicken Quesadillas with Avocado & Pico de Gallo (fresh salsa)
Photobucket

Quesadillas

Serves 4, 2 each
Ingredients
8 tortillas
around 1 1/2 cups of grated cheese
around 2 cups of cooked chicken cubes
1/4 avocado, sliced (optional)
butter, to spread on the tortillas (optional)

Directions
Cube chicken and just cook it.
Butter one side of each tortilla, if you don't want too much fat, just don't butter the tortilla.
Prepare the avocado by cutting it in half, twisting the 2 halves to separate them, using the knife technique to extract the seed, then quartering it lengthwise. Lightly slice each quarter into lengthwise strips.

Now, heat the pan. If you like using butter, butter the pan, if not, use something like vegetable oil. Personally, I dislike using to much butter, so I just use vegetable oil to oil the pan and I do not butter any of the tortillas at all. Put one of the tortillas on the pan, once the pan is heated up.

Start adding cheese to one side of the tortilla. The amount of cheese you put is actually up to your own tastes, that's the good thing about making these yourself. If you like cheesy food, add a lot of cheese, if you just like a little, put a little. After a few seconds or so, the cheese will start melting and then you can add a portion of chicken onto the quesadilla. Fold the quesadilla in half and you're basically done.

When the tortilla is crispy and the cheese is all melted, the quesadilla will taste really good. They are really easy to make and you can give the recipe a twist by adding chunks of pineapple with bbq chicken, or steak with cheese, it basically works with anything. :) Serving them with salsa will make this a very delicious and easy meal.

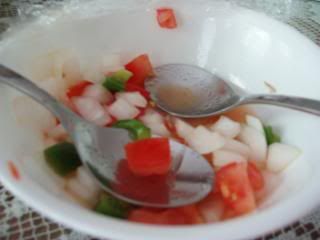
Pico de Gallo
Photobucket
Ingredients
1 tomato
1/4 onion
1/3 bunch of cilantro
[1 jalapeno chili]
1 lime
a pinch of salt

Directions

Dice the tomato and onion, put in a small bowl. Add in the coarsely chopped cilantro leaves to the bowl. Add in chopped up jalapeno if you like spicy stuff. First slice it lengthwise and remove the stem, membranes and seeds. Squeeze the juice of one lime into the bowl and add one pinch of salt. Mix around and you're done.

Tip: Rolling the lime around on the table top while pressing down will make it easier to squeeze out the juice because the cells of the lemon will break down.

Wednesday, June 16, 2010

Simple Wraps

My grandma made this for lunch one day. She decided to make them after seeing them made on this tv show. I thought that they were pretty good and easy to make. So here's the recipe. It's going to be a rough estimate of everything since I wasn't there watching how she made it, but here are my guesstimates.

Simple Wraps

Photobucket

Serves 4
Ingredients
8 tortillas
2 cucumbers, cut into long strips
4 eggs, scrambled
2 hunks braised beef, cut into thin slices
(they can just be cooked, doesn't need to be braised)

possible variations:
pork floss instead of beef
braised pork, sliced thinly

Directions
Whisk the eggs and cook them. Cook them so that they turn out in thin sheets. It would be easier to cook the eggs in four equal portions so that there is 1/2 an egg in each tortilla. Set the cooked eggs aside.

Slice up the cucumbers into thin strips and set aside.

Slice up the cooked meat and start arranging a few slices on each tortilla. Add the cucumber strips and eggs. Each ingredient is distributed evenly so that the tortilla may be smoothly rolled up. Now, roll up the tortillas with their filling. Use a toothpick and poke it through the skin of the tortilla to keep it in place. Cut the finished rolls/wraps in half and serve or just serve them whole.

Photobucket

Saturday, May 29, 2010

Quick Soft Breadsticks

Photobucket
So today was my grandpa's death-day and my grandma invited my uncle and his family over to commemorate this day. I actually never knew my grandpa because I was born exactly a 1/2 year after his death. Anyway, for this day my grandma cooked a variety of dishes. I, on the other hand, made breadsticks.

These breadsticks are very simple to make and I was able to make them even though I am a beginner at bread making. I enjoyed kneading the dough, it actually has a very relaxing effect. If you're ever feeling angry or annoyed, you can also take out your anger on the dough. :) Afterward, you will feel happier.

Recipe here. Originally from recipezaar

I have baked bread before, but today was my first time actually dissolving yeast. The recipes I used before always said, "Dissolve yeast in water/milk.", but I never actually dissolved it because I was too scared of killing the yeast. So when today I used hotter than normal water and the yeast started dissolving, I was like "Oh no!".
Photobucket
A close up of the yeast bubbling. It was soo cool!
Photobucket
Luckily, yeast is supposed to do that. I used active yeast, so that's why I always dissolve it. In addition to adding yeast to water, I also added 1 tbsp of the brown sugar out of the 3 tbsp asked for in the recipe. So later on, I just added two tablespoons.

Photobucket
I stirred together the dry ingredients (flour, salt, brown sugar).

Then I added the sugar yeast water.

Photobucket

Stirred and stirred.

Then I added the vegetable oil and kneaded it in. The dough felt so smooth and nice.

Photobucket

Leave to proof.

Photobucket

Punch the dough out to get rid of air bubbles and roll it out into a rectangle.

Photobucket

Cut dough into strips; I used a dough scraper to cut it.

Photobucket

Shape the dough in strips or twists, depending on your preference.

Rest dough for 30 minutes. I took some precautions and covered the dough with saran wrap to prevent a crust from forming. I don't know if that really would happen, but I didn't want to risk it.
Photobucket

Bake and enjoy the delicious breadsticks.

Photobucket


When the bread is done, it might not look it, so just quickly sample a piece in the middle (use food scissors or risk "burning" your fingers, don't ask :)If it isn't done yet, just pop it back in the oven. I also took this chance to brush the tops with butter and to sprinkle some garlic salt.

Notes:
Brush a generous amount of butter before serving, sprinkle some garlic salt on top of that.

or

Heat up some spaghetti sauce (bolognese preferred)and use as a dipping sauce.

or

Sprinkle some cheese, grated or powder and bake.

I also think that this breadstick dough is suitable for making pizza. This is way easier than making the "actual" pizza dough because you don't even need a pizza stone for this dough.

Saturday, May 15, 2010

My First Fried Rice

Photobucket
I made my first fried rice last Friday for a Chinese school project. I had to cook it the night before Chinese school, the next day it still tasted good even though it became 2 days old rice. Here's the recipe. As you can tell, I added a lot of veggies.

So I just followed all the directions and it turned out good. The only problem I had was the rice sticking to the pan...it eventually became this "chip". This is what happened.
Photobucket

Now the step by step instructions.

First, I prepared the marinade.
Photobucket
Here's the ground meat with the egg.
Photobucket
I then added the amount of meat needed for the recipe into the marinade and mixed it together.

Also, remember to refrigerate the cooked rice a day in advance, to ensure that your rice won't become soggy when it is cooked.
Photobucket

Then I heated up the pan and then added oil. When it was ready I started cooking the meat.
Photobucket

Keep cooking it until it's almost done, but not really.
Photobucket
I realize now that I might have overdone it, but the overall product turned out fine.
Photobucket
Put the meat in a separate bowl.
Photobucket
Prepare the veggies, I used cabbage and spring onions.
Photobucket

Cook the egg, and when the egg is almost done, add the rice. Mix.
Photobucket

Add the soy sauce.
Photobucket

and the cabbage and meat.
Photobucket
After I stirred in the cabbage I was worried that it wouldn't cook because it wasn't in contact with the pan. However, after a while it cooked, so don't worry if that happens to you. I am still a beginner cook though, so I doubt it will happen to other people. :)

Then, we're done! Yay! Mission accomplished.
Photobucket

Funny short story: This rice was for the Chinese school project right? Well, the project was cook a dish, get the recipe, and give a report on how to cook it. It ended up with half the class bringing fried rice cuz it's one of the easiest thing to make. Lol

LinkWithin

Related Posts with Thumbnails