Showing posts with label breakfast. Show all posts

Friday, September 14, 2012

Monkey Bread

The first time I made monkey bread was in a summer school cooking class.  Mr. I. introduced the recipe to the students and we made the easy version of monkey bread.  We used canned biscuit dough and cut each piece of dough into four pieces and rolled them into balls.  Then, we dipped the dough balls in butter and cinnamon sugar.  This was such a fun recipe.  My family enjoyed what I brought home so much that we made monkey bread several times at home.

While surfing the web, looking at recipes, I found this monkey bread recipe that starts from scratch.  I didn't actually make the monkey bread until a year later.  The recipe was really simple and the bread was very soft and fluffy. It also wasn't too sweet. (I didn't make a glaze.  Actually, I kind of forgot about...but the bread was sweet enough already so it didn't matter.)  This is definitely a must make recipe.  Monkey bread is like the best part of cinnamon rolls - the gooey, yummy centers.

Monkey Bread
Recipe from the Brown Eyed Baker, very slightly adapted.
Photobucket

Photobucket

Photobucket

Thursday, January 12, 2012

Hoddeok 호떡 - Sweet Korean Pancakes

Recently last year, I got into K-pop and Korean dramas.  It all started with Personal Taste, a drama that my aunt recommended to me.  Ever since that drama, I have been watching many other Korean dramas.  My addiction led to an interest in Korean food and desserts, so as I was watching Maangchi's videos on cooking, I discovered this recipe for hoddeok 호떡.  When I found this recipe though, I was still at my college dorm.  So once I got home, I was catching up on the posts of people I follow and I saw the same recipe on Lena's blog. :)   This spurred me into action and I decided to make the pancakes in a couple of days.

The pancakes were easy to make and they turned out okay.  I really liked how the brown sugar melted in the pancakes, giving a nice caramelly filling.  The walnuts also gave the pancakes a bit of a crunch, in contrast to the soft texture of the pancake.  However, something I was unsatisfied with was the texture of the pancake.  The pancake was supposed to be soft and fluffy, but some of mine turned out chewy.  I'm guessing it's because of the squishing during the frying process, but I'm not sure, so I plan to try out this recipe soon again.  I just looked at reviews of this pancake and it turns out it is supposed to be a little chewy.  Anyhow, this recipe is really easy and the end result is tasty. 

Hoddeok
호떡

Photobucket

Photobucket
Recipe from Maangchi 

Sunday, May 15, 2011

Chocolate Chip Muffins

I wrote this long post about these muffins and then I found out blogger crashed. I don't feel like repeating everything I said, so I'll just give a basic review. The muffins were good, but they weren't what I was looking for. I really like this mini chocolate chip muffins that are super moist, with the chocolate chips just melting in your mouth. This type of muffin is the one found in Costco. So when I saw this recipe, I was really hoping that the muffins would turn out like Costco's mini cc muffins. However, these are still good muffins. They're very good for beginners, because all you have to do is gather the ingredients and mix.

Chocolate Chip Muffins
Recipe from Cooking During Stolen Moments
Photobucket

Photobucket

Tuesday, March 22, 2011

Rich and Sweet Berry Scones and Award

These scones are pretty fun to make because you can pretend that you're making puff pastry because of the folds you need to make. They weren't too sweet and sprinkling some sugar on the tops is a good idea. I did not brush the tops with butter because I felt that it was unnecessary, and I only topped one scone with sugar. The sugar topped scone was less prone to browning. It also made for a prettier scone. While I baked these scones, butter leaked out. I don't think that's supposed to happen, but I don't know what I did wrong. Anyway I hope you enjoy the recipe.

Also, this past week I received an award from Lena from Frozen Wings. I didn't get around to writing this post until now, but I would like to thank her for giving me my first award. It really means a lot with me and I would like to share it with several other bloggers. Please read more to find out who got the awards. Also, please check out Lena's blog; she has many beautiful bakes and delicious food. Thank you again Lena!

Rich and Sweet Berry Scones
Photobucket

Photobucket

Photobucket


Saturday, January 29, 2011

Chocolate Glazed Baked Doughnut Muffins

After going through several recipes, trying to use up my sour cream, I finished up the last of my sour cream with this recipe. Originally, I planned to make one batch of these donut muffins, but after realizing I would have a few tbsps of sour cream left, I decided to use up all the sour cream and adjust the amount of ingredients accordingly.

The method used to make these muffins involves reverse creaming. Reverse creaming is when you add butter to the dry ingredients and work it in, instead of creaming butter and sugar first. This makes the texture of the treat more tender and results in a tighter crumb. This method is also used when making scones and biscuits.

These donut muffins really did resemble donuts. They're the healthier version of donuts. I thought it tasted pretty good, not too sweet and nice texture. My brother didn't like these as much because he suspected me of putting whole wheat inside. (Shh, he doesn't know yet ;) My friend said that it was a bit dry, but I think that might be because it was a day old. I also gave one to my teacher because she loves cupcakes and this is classified as a cupcake imposter, she liked it enough to ask me for the recipe. With that said, I think these are best eaten the day of baking.

Chocolate Glazed Baked Doughnut Muffins

Recipe from Joy the Baker who adapted it slightly from Doughnuts
Recipe adjusted by me to make 12 doughnut muffins
makes 12 doughnut muffins
Photobucket
Photobucket

Photobucket
Please note: Because of my wacky adjustments, I used a scale to measure everything out and some ingredients were not measured out exactly as required... I bet you'll be laughing after you see how I adjusted the ingredients. :D

Tuesday, January 25, 2011

New York Style Coffee Cake

Last month, I bought a huge container of sour cream. I wanted to make Honey Bee Sweet's marble cake and to attempt making many more desserts that required sour cream. With that container of sour cream I was able to make 1 batch of scones, 1 marble cake, 1 sour cream pound cake, 1 New York style coffee cake and 1 batch of chocolate glazed donut muffins. I was halfway through the container of sour cream when I didn't know what else to make. I went on google reader and found this recipe that used a bunch of sour cream. Right then and there, I decided that I would make this cake.

The cake was pretty simple. The only problem I ran into while making this cake was I ran out of eggs. A few steps into the cake making, I looked in my fridge and discovered that we only had one egg left! Luckily, my aunt and uncle live only a few blocks away, so I quickly called and asked if I could have some eggs. My grandma answered the phone and said, "Come on over." I rode my bike there, got the eggs, returned home and promptly started continuing my cake mixing. Problem solved!

I didn't have a 9x13 glass pan so I used a 8x12 glass pan. I chose to decrease the topping by 25%. Boy am I glad I did that! When the cake was baking, it rose; if I had made the full amount of topping, my cake would have spilled over. That would have been a terrible disaster... Now it's time for the recipe.

Thanks to Karly from Buns In My Oven for sharing this recipe!


New York Style Coffee Cake

Very lightly adapted from Buns In My Oven who got the recipe from Baked Explorations
(I changed the proportion of the crumb topping and the cake. I also slightly decreased the amount of sugar in the cake.)
Photobucket

Photobucket

Monday, December 27, 2010

2nd Time Cinnamon Rolls

Photobucket
Packaged and ready to be given away to my teachers as their Christmas gift
Photobucket
I originally wanted to give them to my friends too, but I ran out.


I made Pioneer Woman's cinnamon rolls again. The last time I made them, they were sliced into 1 1/2 inch pieces. This time they were sliced into 1 inch rolls, so I was able to make many more rolls. I had extra rolls that I didn't know where to put, so I put them into cupcake liners.

Photobucket

Wednesday, December 15, 2010

Sour Cream Chocolate Muffin

When I first saw these on Dodol&Mochi, I was intrigued. Her muffins looked moist and chocolaty; they also used sour cream! I think the sour cream was main reason why I made these muffins. Whenever I get sour cream, I always end up with a tiny bit left over that I don't know how to use up. So this post came out at the right time.

I would say the muffin is good. I thought that it was a bit oily though. The texture was nice and it reminded me of the chocolate muffins I made previously with the recipe from Cookie Madness. I just didn't like how oily it was because when I held the muffin and took my fingers away, I could see my fingers glistening with oil. What a contradiction right? I like to bake, but I don't like oily things. I have nothing against this recipe though. Something to take note of, my muffins look very different from Pei-Lin's muffins, so maybe it's something that I did?

Sour Cream Chocolate Muffin
Recipe from Dodol & Mochi
I made 8 muffins.
Photobucket

This one has a nicer dome. I don't know why, but my muffins don't look as moist as Pei-Lin's? :(
Photobucket

Monday, November 29, 2010

Sour Cream Pound Cake

So, I just baked my first pound cake today. (10/24/10) In fact, I am typing this post as it's baking in the oven right now.

I can't believe how it's already the end of October! Wow, then it's going to be November and then I will have to send in my college apps. These days I really wanted to bake some bread, especially some bread with matcha. However, my kitchen scale was not functioning even after I changed the batteries. Then one day I tried looking at the scale again and it worked. Whewf...I was so worried that my scale broke. It does use up batteries quite fast though.

I made this pound cake for English class because we just read the book Frankenstein, and now we have a non-fiction research project. I decided to do one on food during the Romanticism period. I discovered that pound cakes were created during the 1700s and that they are called pound cakes because of the simplicity of the ingredients. A pound of butter, sugar and butter along with some eggs would give a pound cake. Back then, most women couldn't read so just memorizing the ingredients by pounds made it much easier for them to make pound cakes.

Then I immediately thought of Von's recipe. She shared this beautiful pound cake recipe on her blog. It looked amazing! The texture was perfect and everything, so I just had to make it. I was a bit doubtful of how mine would turn out and I didn't get to try the recipe out until today because I ran out of yogurt/sour cream.

However, after making it, it wasn't that bad. I was worried mine would not turn out because I have very few successes on baking cakes. Luckily for me, the batter was pretty thick and it smelled really good. The only sad part was that there were a lot of holes in my pound cake.... it didn't look like Von's pretty, tight crumbed, yummy looking cake. I'm guessing that I might have overbeaten the eggs and incorporated extra air into the batter, causing the little holes. Please correct me if I'm wrong though.

Sour Cream/Yogurt Pound Cake
Recipe from Vondelicious who got it from the Better Homes and Gardens Cookbook
Photobucket

Saturday, October 16, 2010

Cinnamon Rolls

I made cinnamon rolls on 10/10/10. :) So "today", I decided to make cinnamon rolls after setting my eyes on a particular recipe by Pioneer Woman. I actually wanted to make this a few weeks ago, but I didn't feel brave enough, didn't have the time, and didn't want to make something so rich.

Cinnamon Rolls

Recipe from Pioneer Woman
halved, makes around 20 rolls depending on width
Photobucket
Ingredients
2 cups milk
1/2 cup oil
1/2 cup sugar
1.8 tsp instant yeast
4 cups of flour
1/2 cup flour
1/2 teaspoon baking powder
1/2 teaspoon baking soda
1 1/2 teaspoons salt (I used a bit less)
1/2 cup butter, use enough to spread over the whole rectangle and reserve the rest for the glaze
1/8 cup cinnamon
sugar, I directly sprinkled it onto the dough

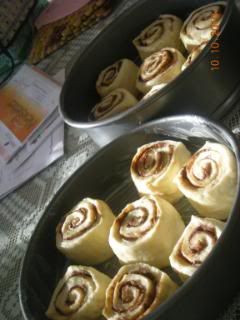
So I halved the recipe and made 17 rolls, each were 1 1/2 inches thick.

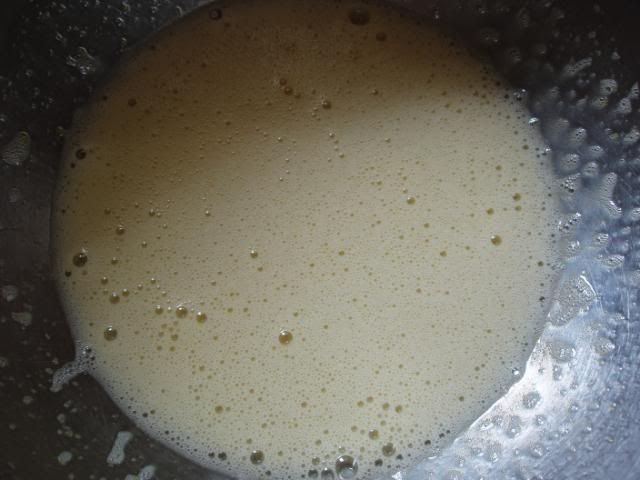
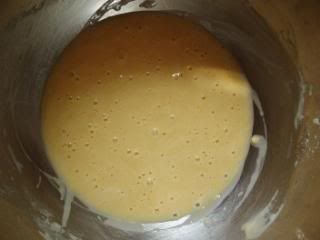
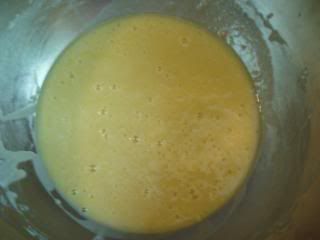
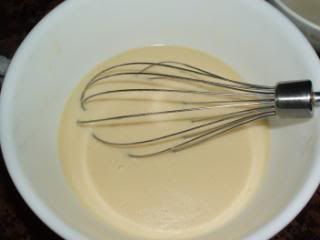
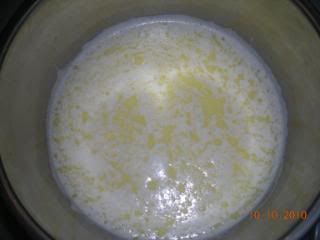
First, I scalded the 2 cups milk, 1/2 cup oil, and 1/2 cup sugar. I mixed it together on medium fire and let it cook up until just before it boiled. By then, the milk started to look a little foamy. The oil isn't supposed to meld together with the milk even after you stir it, so if you see a layer of oil don't worry.
Photobucket
I had to let the mixture cool for around 1 hour or so, it was pretty hot today too.

I used instant yeast, also known as bread machine yeast, instead of using active dry yeast. I only used 1.8 tsp of the instant yeast which is around 1 tsp+ 3/4 tsp+ 1/8 tsp because instant yeast is more "concentrated" than active dry yeast.

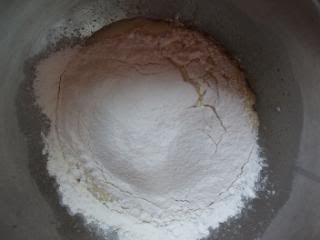
Instead of letting the yeast sit in the milk mixture for 1 minute, I just dumped the yeast into the mixture and proceeded to mix in the 4 cups of flour without waiting. I think I might have miscounted the cups of flour, but I'm not sure. I used a 1/3 cup to measure out the flour and I wasn't 100% paying attention. I stirred it until the dough just came together.

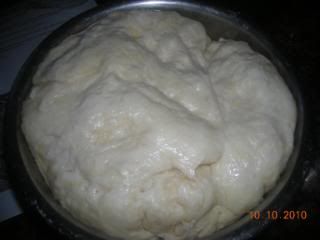
Then I set it aside for 45 minutes because something came up and I had to leave the house. I was worried that the rising time wouldn't be long enough, but I had no choice but to quickly mix in the remaining 1/2 cup of flour, 1/2 tsp baking soda, 1/2 tsp baking powder, and the salt. After I quickly mixed/kneaded it in, I put it in the fridge to rise. I came back home after around 30 minutes or so and the dough was looking nice and soft. The texture of the dough actually reminded me of pretzel dough.
Photobucket
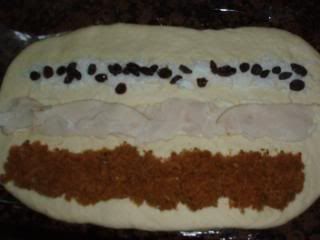
Then I punched the dough down a bit and started to roll it out into a 30x10 inch rectangle.

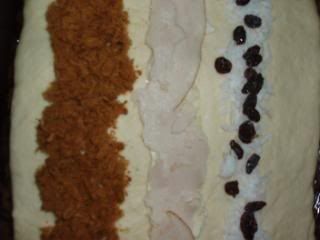
After that, I melted around a 1/2 cup of butter when the recipe called for around 1 cup, but 1 whole cup would be way too much. After it was semi melted, I commenced brushing it on the rectangle. Note: if you don't want the rolls to be too messy, don't totally melt the butter, just melt it enough so that it's semi solid but still easily spreadable and then I used a pastry brush to spread it.
Photobucket
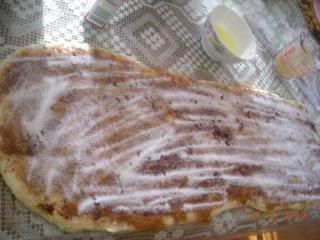
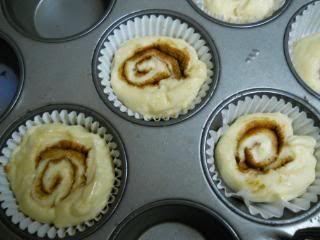
Sprinkle it with sugar and cinnamon. I first added the cinnamon and then I added the sugar. Actually, it doesn't even need to be measured out. I definitely didn't use one whole cup of sugar. After that, start rolling it up from the side that is farthest away from you. Roll it up tightly and then cut the roll into 3/4-1 1/2 inch pieces. I cut them into 1 1/2 inch pieces, so I had to bake them longer than the called for time.
Photobucket
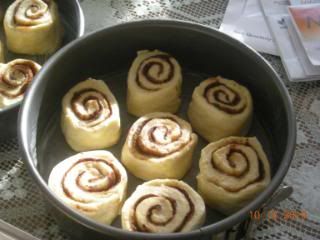
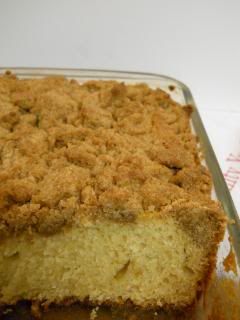
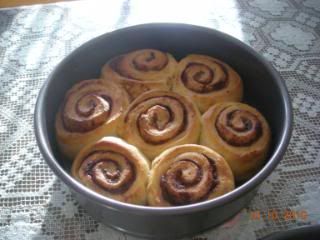
Put the rolls into a buttered pan and then let them rise for 20-30 minutes. I accidentally skipped that part because I wasn't looking at the original recipe, but my rolls still turned out. During the time they were baking, I was freaking out because I realized right then that I needed to let them rise when they were already baked for around 5 minutes.
Photobucket

Photobucket

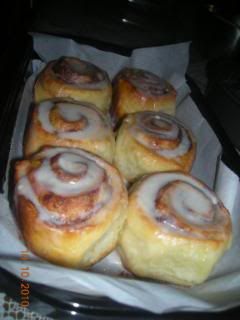
Anyways, they turned out alright even though I forgot to let them rise more. I also prepared the glaze by using up the butter that came from my original 1/2 cup that I didn't use up. I added a little less than 1/4 cup of milk and a whole bunch of confectioner's sugar. I didn't measure it, I just mixed and kept adding until I got the consistency I wanted.

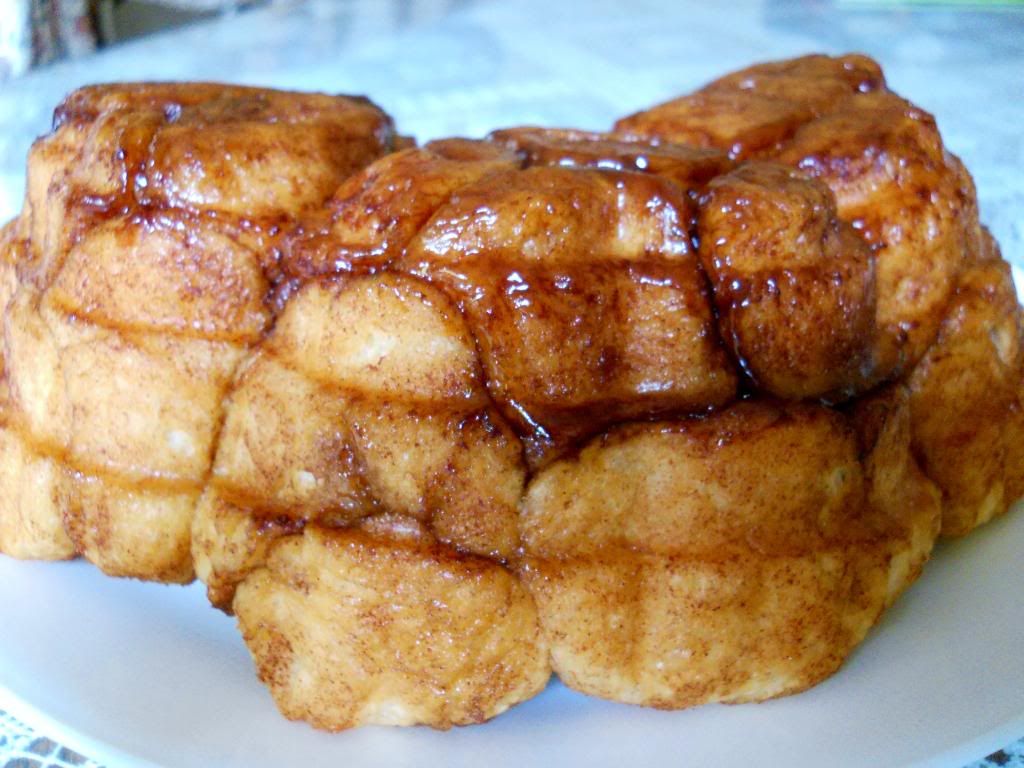
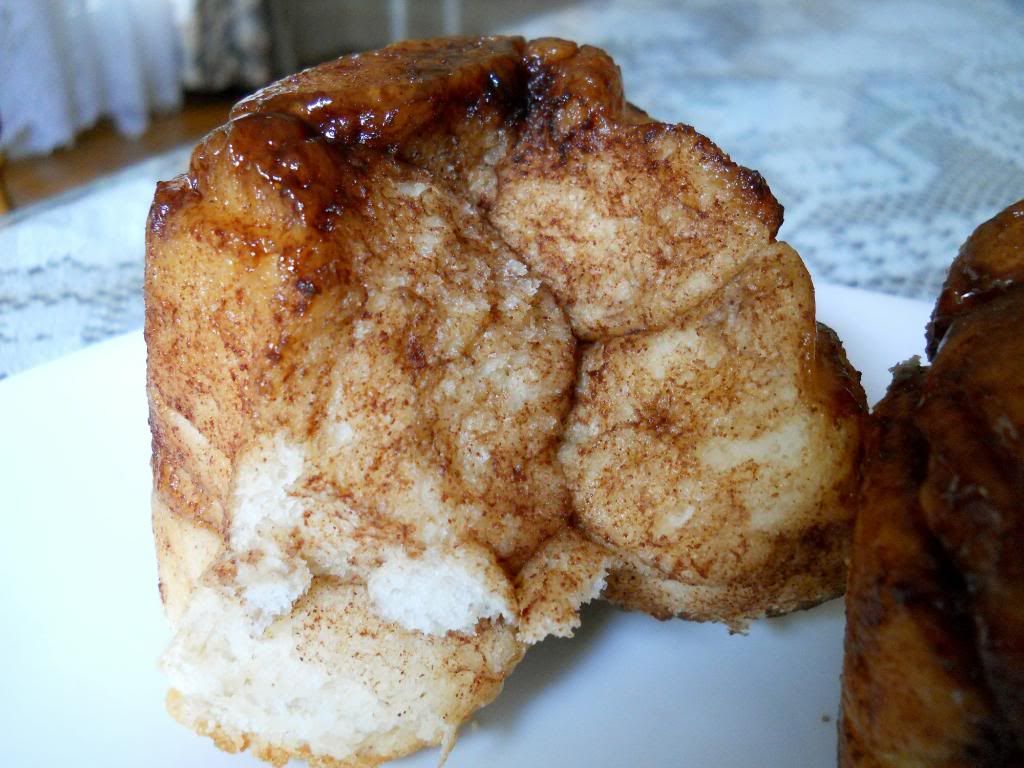
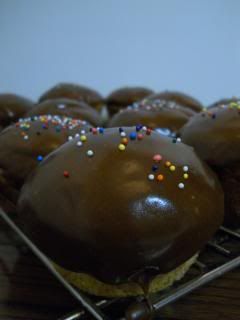
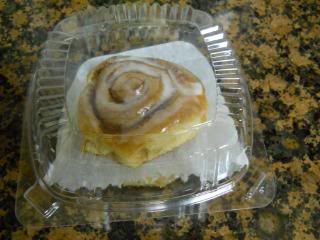
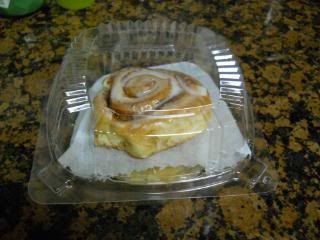
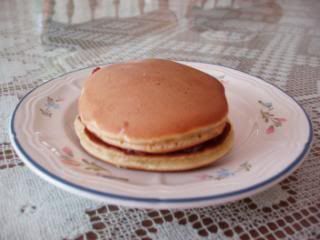
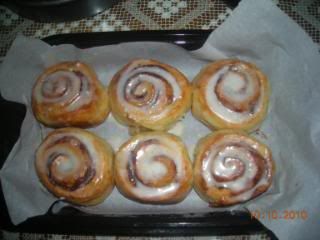
I baked the rolls until they were golden light in color and took them out of the oven and cooled them and poured the icing on top. Let the icing set and tada, it's done.

Review: my brother rated it a 9.5/10 which is very, very good. He said to improve it I should make them bigger. =) My dad couldn't stop eating it and I was a bit worried for his health and I felt guilty, but I just can't stop baking when I have the time.

I baked them in a 9 inch pans btw.
Photobucket
Photobucket
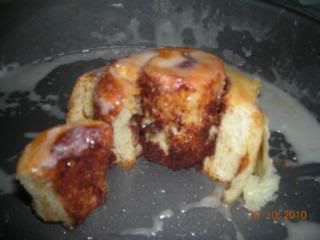
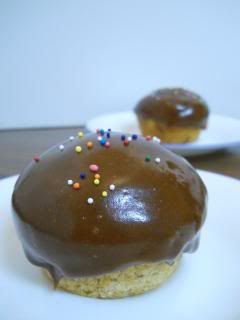
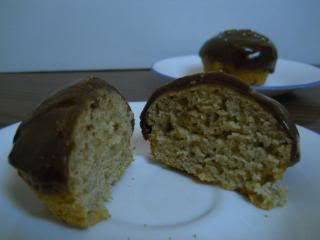
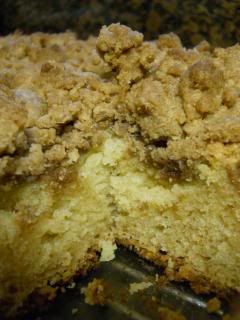
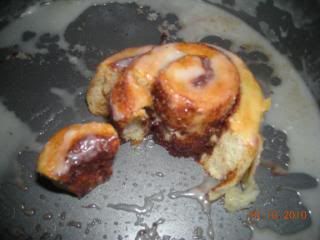
The texture was very good. Nice and soft. The icing was nice. Together, it tastes fantastic. It actually kind of reminded me of a donut.
Photobucket

More tips from:
1 Pioneer Woman
2 Bakerella

Variations:
Orange-Marmalade Rolls
Caramel Apple Sticky Buns
Chocolate Chip Cookie Sweet Rolls

Sunday, September 5, 2010

Sour Cream Chocolate Chip Scones

As you know, my family is a big lover of scones. If you didn't before, now you do. =D From the first time I made scones to the many other times after that, I have always used one recipe, the one from my Williams-Sonoma Sweet Treats book. Sure, I might have substituted some ingredients like evaporated milk for heavy cream, but I have never tried another scone recipe until today. I was only looking for a way to quickly use up the leftover sour cream I had from the black bottom cupcakes I made recently, when I stumbled upon this recipe. I bookmarked it immediately and finally made it today. (August 27)

Click here for recipe.
Photobucket
Btw, sorry for the terrible quality picture.

The texture of the scones were amazing. My grandma and dad loved these scones. They said it tasted much better than the scones I made before. The brown sugar gives these scones a surprisingly nice grainy texture between bites. Grainy might be a negative connotation when it comes to food, but it was perfect for these scones. What I mean is that you can still kind taste the brown sugar, it just adds to the already good scone. Also, right from the oven these scones were really nice and fluffy you could say. I gave some to my friend C. and her mom said that they tasted better than the bakery's scones. So thanks to Anna from Cookie Madness for this recipe.
Photobucket
Photobucket
Photobucket
Different lighting makes a big difference. And oh no, I think I might have broken the camera. That or it just broke suddenly. The zoom lens won't retract back in. :(

Photobucket
I made that awesome bread again!
Photobucket
This time I tried it with 3 fillings. Pork floss, turkey and swiss and coconut and raisin.
Photobucket


Update about school:
Wow, school is so busy already, at least it is for AP calc. There is so much hw for Calculus it's scary. Or more specifically, so much time spent doing the hw. English, a class I thought to be easy, is actually harder than I thought. The teacher is new and she's giving a lot of hw. Oh well, I'll survive. Now, there isn't a lot of weekend hw, but there is still a good amount. Spanish is taking me longer to finish than usual, as expected from an AP class. I already can't wait for the summer to come, haha. I get to go to Taiwan then as a graduation present and visit my grandparents and a few cousins there.

Thursday, August 19, 2010

Dorayaki

Dorayaki are basically a sandwich of two pancakes with a filling inside, usually red bean paste. They are also known as 铜锣烧 aka tong luo shao. These are one my childhood favorites. Whenever my mom goes to a certain supermarket, she will always buy a few for me. I barely ever go to that supermarket, but when I do it's very fun to watch the people make those dorayaki. I was looking through many different blogs to find a dorayaki recipe and I decided to use Angie's recipe because I had all the ingredients on hand. :) Yay! I was a bit anxious about using this recipe because I tend to have problems with recipes that need whipped eggs to attain a cake like texture. I still persevered though, and it was successful.
Photobucket
Although it took quite a while to make it, it was only because this was my first time using this recipe. It took me a bit longer to cook the pancakes, but I quickly learned the trick to it. Just use one tablespoon of batter and cook for a minute or 2 and wait for bubbles to emerge before flipping it over. For the first few pancakes I had a problem with the middle layer being a bit raw, but that was soon solved after I got the hang of it.

Click here for the recipe.

I'm only going to list the ingredients and the amounts I will use next time. Please refer to Angie's blog to get the directions. The directions are very clear and easy to understand.

2 eggs, room temperature
50 grams sugar (original called for 80 grams)
120 grams cake flour (I had to use ap flour with cornstarch again)
1 tsp baking powder
1/4 tsp baking soda
30 ml milk
1 tbsp honey/caramel (I used honey)
100 grams red bean paste (recipe called for mung bean aka green bean)

For the amount of sugar, I wasn't sure if I could reduce it, but I asked Angie and she said that it was ok and it wouldn't adversely affect the texture of the dorayaki. Next time, I'll definitely reduce the sugar.

The dorayaki tasted like those sold in supermarkets. Fresher of course, but they had the same Japanese taste if you get what I mean. I really enjoyed eating them.

Whip the eggs and sugar until they look something like this.
Photobucket

Prepare all the dry ingredients and whisk them together.
Photobucket

Sift them into the egg and sugar mixture and fold the batter.
Photobucket

After the batter is set aside for 30 minutes, there are bigger air bubbles.
Photobucket

Spoon some batter onto the hot and lightly oiled pan.
Photobucket

Cook for a minute or two, it depends, until bubbly then flip it to the other side.
Photobucket

Photobucket

Spread red bean paste onto pancake and put two pancakes together and you get a dorayaki.

Photobucket

See the nice texture?
Ok, maybe it's not that clear, but oh well.

Note: When you sift the flour into the sugar and eggs, you will hear a slight deflating sound, don't worry though, everything will be alright.

For folding in the dry ingredients, please refer to this link to help you out. Christine's Recipes' blog really helped me learn how to do that. :)

Another note, don't make this if you are short on time.

Have fun!

Sunday, August 15, 2010

Chocolate Muffins

First time I made chocolate muffins! They were really easy just like how Anna from Cookie Madness described them as.
Photobucket

Click here for recipe.

I had to substitute the self rising flour with flour and baking powder instead. I posted the ingredients below as a note, please refer to Cookie Madness for the directions. With this recipe I was able to make 7 even to it's supposed to make 6.
Photobucket
3/4 cup plus 2 tablespoons self rising flour (I used 3/4 cup plus 2 tbsp all purpose flour with 1 1/3 tsp of baking powder, you should add a pinch of salt if your butter is unsalted)
3 tablespoons unsweetened natural cocoa powder
1/4 cup granulated sugar (generous or slightly heaping ¼ cup)* I just used 1/4 cup and it was fine*
5 tablespoons butter, melted and cooled
1 large egg (I used an extra large egg, even though it didn't look extra large to me)
3 oz evaporated milk (1/4 cup plus 2 tablespoons)*I used a bit less because I ran out*
1/2 teaspoon vanilla extract
1/2 cup semi-sweet chocolate chips (I used a 1/4 cup b/c my family doesn't like eating a lot of chocolate chips)
Photobucket
All the liquids mixed together.

Photobucket
All the dry ingredients.

Photobucket
Batter with chips.

Photobucket
In their separate cups.

Photobucket
Done!

My mom said that they tasted better than Costco's muffins! Well, her reason was that Costco's muffins were way to oily. But still, I thought the muffins tasted pretty good. They didn't take much effort and it was really easy to clean up the mess (wash dishes and such). So if you ever have any guests over for breakfast, make a batch of these muffins and they'll love it!

LinkWithin

Related Posts with Thumbnails