This is something that I have eaten since I was a little kid. The instructions are really simple, and I would say that this is a Chinese dish. If you want, you can also add some scallops on top or abalone to give it a special flavor.
Steamed Eggs
Serves: 4
4 eggs
1 can chicken broth
1 can water (use the chicken broth can to measure)
Mix the three ingredients together, using a whisk would be easier. When the mixture is uniform in color you can start steaming it.
Steam until it is pale yellow in color, so that when you stick a chopstick in the middle the chopstick comes out with nothing goey. This takes around 20 minutes or so. The time varies.
Wednesday, April 28, 2010
Shrimp and Eggs
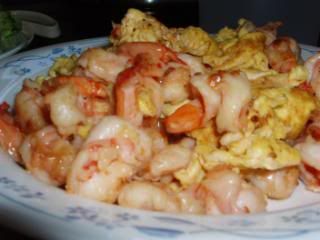
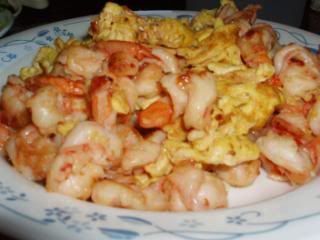
The recipe below is something that my mom cooks occasionally. I don't know if you would classify it as Chinese food, but in my opinion it is just that. I really love eating this dish. The eggs are really good especially with the shrimp. My mom taught me how to cook this and I wrote down the instructions while learning. This is also for my own reference. I still haven't made this yet, but one day I will. :) Can't wait till then.
Shrimp and Eggs
Servings: 4
5 Eggs
2 Cups of shrimp soaked in 2-3 tablespoons of Shao hsing cooking wine
½ scoop of cornstarch (1 1/2 teaspoons)
½ teaspoon of salt
15 turns of the pepper grinder
Vegetable oil for the pan
Peel shells off shrimp. Cut shrimp in half lengthwise. Soak in the cooking wine.
Put around 1 tablespoon of oil in the pan. Make sure oil is hot. Whisk eggs together. Then cook the eggs by letting them “flood” the whole pan and let the raw eggs move to pool at an area until they are half cooked. Scoop eggs out and place them in a bowl. Add more oil
Add corn starch ½ scoop of corn starch to shrimp
Cook shrimp. Turn heat to low. Close pan’s cover. cook shrimp on high heat.. try not to cook the orange ones too long. After 5 minutes put egg w/ shrimp
Mix on medium heat to make mixture uniform
Close the pan’s cover
Then mix the shrimp again
Add white pepper
Then wait before mixing it again
Medium/low heat and then it’s done
Perform a taste test.
Shrimp and Eggs

Servings: 4
5 Eggs
2 Cups of shrimp soaked in 2-3 tablespoons of Shao hsing cooking wine
½ scoop of cornstarch (1 1/2 teaspoons)
½ teaspoon of salt
15 turns of the pepper grinder
Vegetable oil for the pan
Peel shells off shrimp. Cut shrimp in half lengthwise. Soak in the cooking wine.
Put around 1 tablespoon of oil in the pan. Make sure oil is hot. Whisk eggs together. Then cook the eggs by letting them “flood” the whole pan and let the raw eggs move to pool at an area until they are half cooked. Scoop eggs out and place them in a bowl. Add more oil
Add corn starch ½ scoop of corn starch to shrimp
Cook shrimp. Turn heat to low. Close pan’s cover. cook shrimp on high heat.. try not to cook the orange ones too long. After 5 minutes put egg w/ shrimp
Mix on medium heat to make mixture uniform
Close the pan’s cover
Then mix the shrimp again
Add white pepper
Then wait before mixing it again
Medium/low heat and then it’s done
Perform a taste test.

Saturday, April 17, 2010
Blueberry Muffins
I made these muffins using Pioneer Woman's recipe. She actually got the recipe from someone else. The steps are very simple, you can make finish mixing the batter in less than 15 minutes and there aren't that many bowls you need to wash afterward! These muffins turn out to be light and delicate. The first time I made them I did not add that much yogurt, resulting in a sturdier muffin that was easily taken out of the cupcake pan. Today, I made the muffins a second time, adding more yogurt, leading to a softer muffin that I enjoyed much more. The only problem was I had to use a toothpick to loosen the muffins from the pan first.
Here are some pictures.
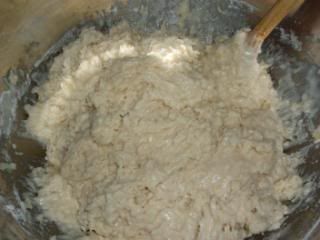
The texture of the batter should look something like this, but it may vary due to the amount of yogurt you use.
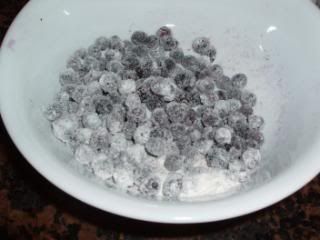
I coated my frozen blueberries with flour so that they wouldn't sink to the bottom. Just in case. :) I learned this from the America's Test Kitchen Baking book.
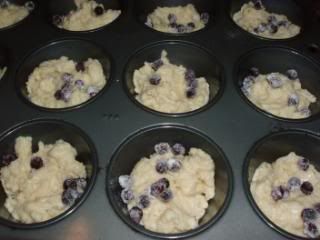
Personally, I don't mix the blueberries with the batter because it just makes the batter blue. So what I do is fill the cupcake pan half full and sprinkle some blueberries, fill it to the top, then sprinkle the last bit of blueberries. Use as much blueberries as you want.
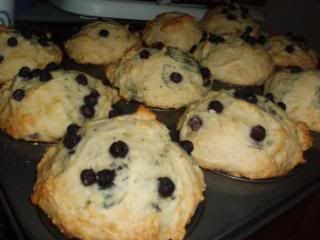

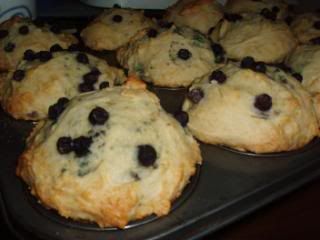
Haha, there are so many pictures of them. :) Have fun baking.
Here are some pictures.

The texture of the batter should look something like this, but it may vary due to the amount of yogurt you use.

I coated my frozen blueberries with flour so that they wouldn't sink to the bottom. Just in case. :) I learned this from the America's Test Kitchen Baking book.

Personally, I don't mix the blueberries with the batter because it just makes the batter blue. So what I do is fill the cupcake pan half full and sprinkle some blueberries, fill it to the top, then sprinkle the last bit of blueberries. Use as much blueberries as you want.


Haha, there are so many pictures of them. :) Have fun baking.
Thursday, April 15, 2010
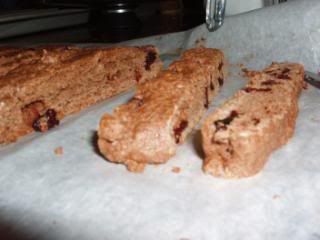
Chocolate and Cranberry Biscotti
I made these awesome tasting biscotti a few months ago. Nice and crunchy, with a just right chocolaty taste. The recipe below is from the book Cook Yourself Thin I do not take any credit for this recipe, but instead I'm sharing it with you. I hope you like it. By the way, the book has awesome pictures and you can find most of its recipes online here
Makes about 1 1/2 dozen
Calories per biscotti: 76
3/4 cup all-purpose flour
1/4 cup finely ground almonds
3 tablespoons Dutch-process cocoa powder
3/4 teaspoon baking powder
1/4 teaspoon salt
1 large egg
1/3 cup sugar
2 teaspoons pure vanilla extract
1/2 teaspoon almond extract
1/3 cup dried cranberries
Melted chocolate for drizzling
1. Preheat oven to 350 degrees and arrange a rack in the center of the oven. Line a baking sheet with parchment paper.
2. Whisk together flour, ground almonds, cocoa powder, baking powder and salt in a medium bowl.
Recipes From This Episode
3. Beat egg and sugar with a handheld or standing mixer on medium-high speed until pale and thick, about 5 minutes. Beat in vanilla and almond extracts. Reduce speed to low, and gradually add flour mixture. Beat until no traces of flour remain. Stir in cranberries. The dough will be very wet and sticky.
4. Scrape the dough onto the prepared baking sheet, forming a thick line in the center. Wet your hands and pat dough into a 9-x-3-inch rectangle. Bake until puffed and dry to the touch, about 25 minutes. Cool on pan for 15 minutes; keep oven on. Peel off parchment and carefully transfer rectangle to a cutting board. Cut crosswise into 1/3-inch-thick slices.
5. Lay slices flat on unlined baking sheet, and bake until dry, about 10 minutes. Flip slices and bake for 10 minutes more. Let cool completely. Cookies will crisp as they cool.
6. Drizzle with melted chocolate if desired.
They are extremely easy to make. Just make sure not to over bake them, as I often do with my cookies. :) I need to work on that.
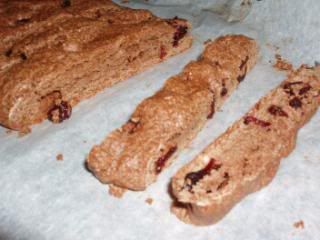
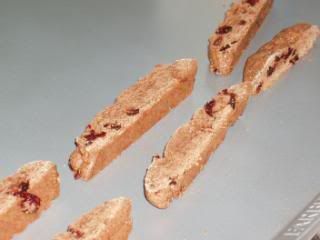
The second time baking them.
Thursday, April 8, 2010
Banana Bread

I got this recipe from allrecipes.com. My adapted version is shown below. The instructions are very similar to the original recipe with a few personal touches. When I first started baking banana bread, the most time consuming part was mashing the bananas. Just mashing them would take me 20-30 minutes! After that, everything else was easy. Now I have discovered an easy solution, and that is to mash the bananas with a fork. If you don't have ripe brown-speckled bananas, but still want to make banana bread, all you have to do is bake your yellow bananas in the oven at around 350 degrees Fahrenheit and they will quickly ripen. I learned this tip from The America's Test Kitchen Family Baking Book. Just know that you can't do that with green bananas, it just doesn't work.

Ingredients
* 1 1/2 cups all-purpose flour
* 1 teaspoon baking soda
* 1/2 teaspoon salt
* 1 teaspoon cinnamon
* 3/4 cup white sugar
* 2 eggs, beaten
* 1/4 cup butter, melted
* 3 bananas, mashed
* nuts to taste, coarsely chopped
Directions
1. Line two 7x3 inch loaf pans with parchment paper. Preheat oven to 350 degrees F (175 degrees C).
2. In one bowl, whisk together flour, soda, salt, cinnamon, and sugar. Mix in slightly beaten eggs, melted butter, and mashed bananas. Pour into prepared pans. Sprinkle coarsely chopped nuts on top of the batter.
3. Bake at 350 degrees F (175 degrees C) for 45 minutes or so, until a wooden toothpick inserted in the center comes out clean.
I sprinkle the nuts on top because you toast the nuts that way and you can actually taste it. If you mix it in with the batter, the nuts will be lost inside. Hope you enjoy this recipe. :)
The consistency of the batter will look like this.

The finished product.


I just love taking pictures of them. :)
Tuesday, April 6, 2010
Introduction
Hey everyone! I forgot to introduce myself. Well, since I doubt that many people(if any at all)will be reading this, it is just for fun. I really love baking. Baking is something that makes my day. I love looking at everyone's food blogs and learning new things. Another thing is that ever since I was a child, I wanted to make my own blog. So now my "dream" has come true. This blog will serve as my journey through baking and also as a simple "tutorial" for people who like baking too. Another thing I love about baking is that I am able to express my love to my family through the sweets or food I make for them. It is my way of saying "thank you", even though I sometimes make a mess in the kitchen. XD I do clean that mess up though.
My first encounter with baking occurred during my elementary school years. One Christmas, I received a book from my aunt and within that book I found a cookie recipe. The cute little cut out cookies with sprinkles as decorations really appealed to me. I decided to try out the recipe which led to my interest in baking. Throughout my middle school years, I baked on and off. I baked chocolate chip cookies whenever I felt a craving for cookies. That was pretty much the extent of my baking skills, other than some other cookies. One day, my piano teacher made some cream puffs and gave some to me. I was very interested in how she made them and so my interest was piqued. Following these tiny events soon came a passion for baking. As I slowly discovered the food blogging world during my junior year, I decided to make my own blog after a while of following people in order to record my journey.
I am so happy that my aunt gave me that book. Also, thanks to my family for being so supportive of me baking. Without their encouragement and taste testing, I probably wouldn't be where I am now.
Anyway, thanks to anyone who reads my blog.
Strawberry Swirl Cheesecake Part 2

Okay, so after the crust, I made the filling. The filling was surprisingly easy to make. All I had to do was beat the cream cheese until it was fluffy. After that, I added the sugar and mixed. As noted in the instructions, the sugar was supposed to be added in a steady stream, but due to my hand mixer, I wasn't able to do that. Everything turned out fine though, so that's good. Then the eggs were added along with the vanilla and salt. The filling was done!

This is what it looks like before you add the eggs.
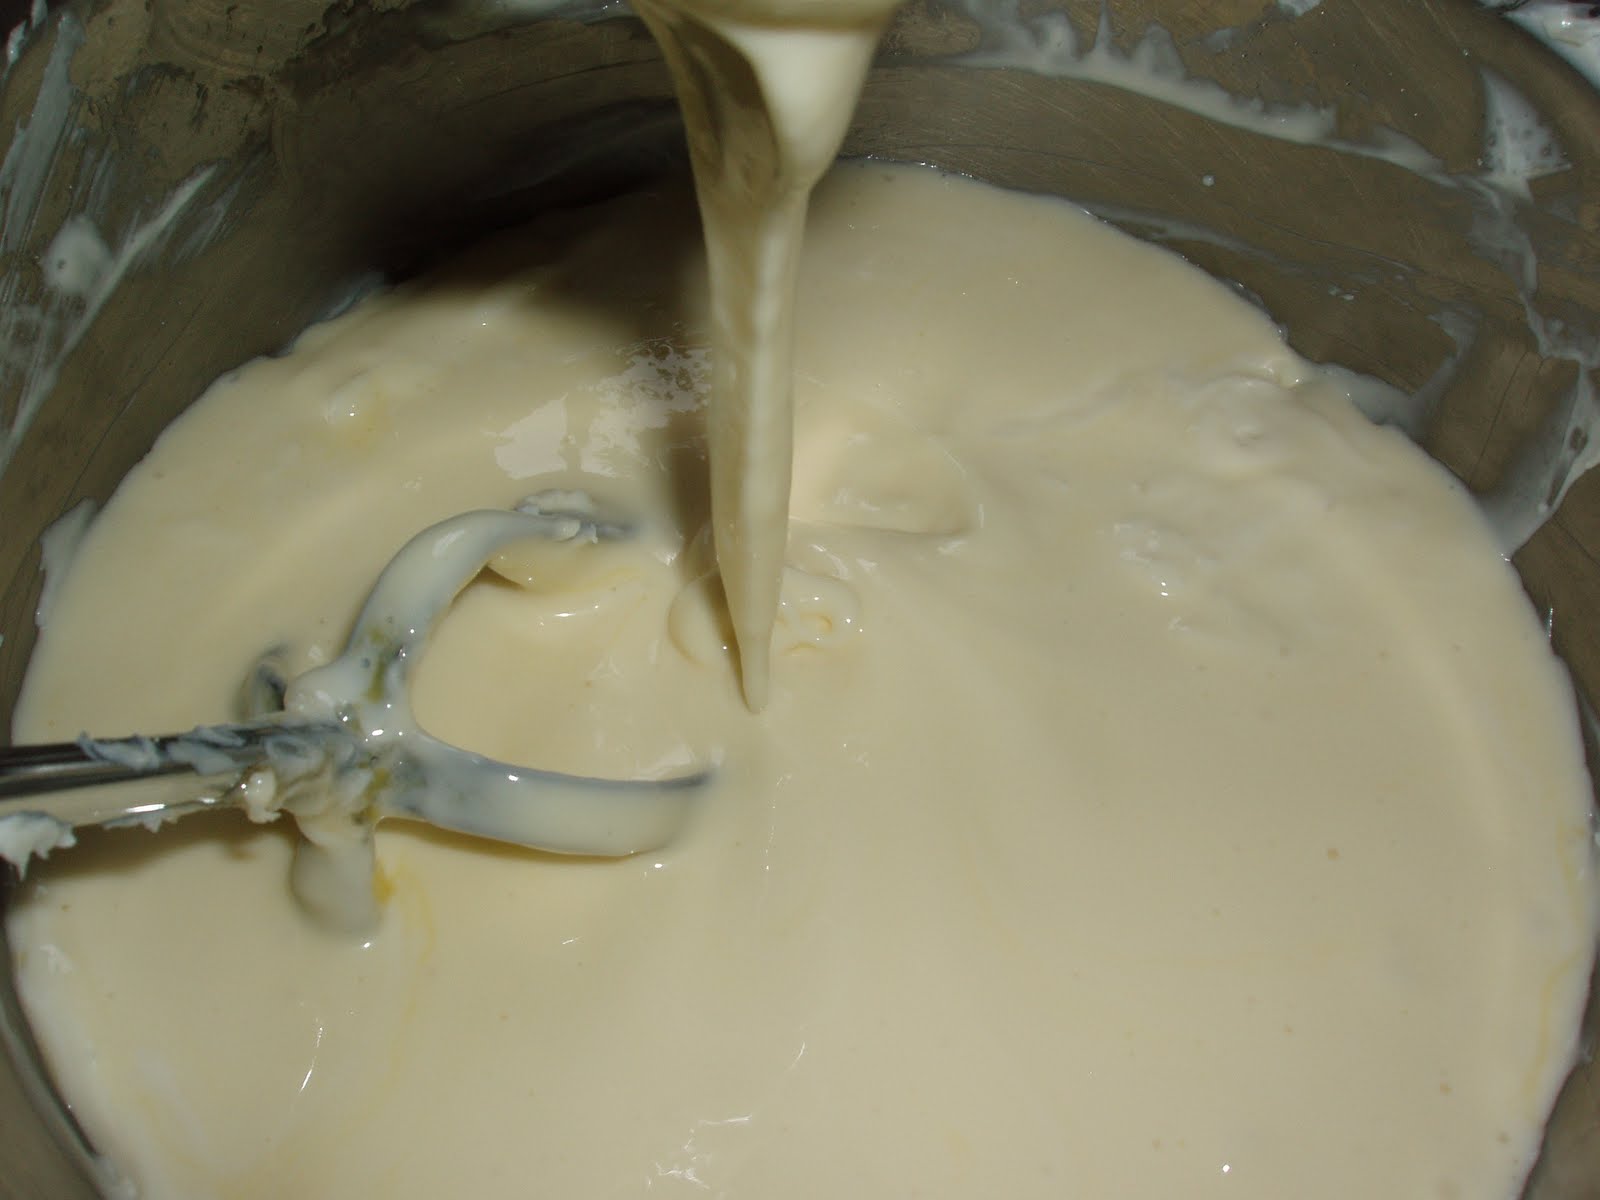
Here, the eggs are already mixed in.

Doesn't it look so creamy?
Now, spoon 3 tablespoons of the filling into each cupcake liner.

Here comes the fun part! I got to scoop one teaspoon of the strawberry puree and make little drops on top of the "cupcake". Make sure to use the whole spoonful. Then make the swirls you want to make with a teaspoon. It is a little hard to make it look pretty, but I got right after a few tries.
The finished sweet! All I had to do was bake them and wait for them to cool down. The only dilemma was that afterward the cheese[cup]cakes were kind of soft, even after the 4 hours of refrigeration. So what I did was to freeze them a bit longer and then they turn out awesome! My family really liked this and I hope you do too.
Strawberry Swirl Cheesecake Part 1

On Easter, I made some some cheesecake. Well, actually they were cheese[cup]cakes. I got the recipe from Monica's blog "Lick The Bowl Good". The cupcakes took a long time to make, but they were worth it. Aren't the swirls pretty?

Instead of using raspberries, I used strawberries. I just weighed out 3 ounces of strawberries and washed them, before cutting off the leaves. Make sure to wash the strawberries carefully because there may be some bugs beneath the leaves or near the seeds. What I did was to soak them in water and then, after the leaves were cut off, process them. I used a small food processor with the blade attachmen
 t to process the strawberries. Pour out the strawberry puree and then add one tablespoon of sugar to it and mix. There you have it, strawberry puree.
 The graham cracker crust was relatively easy to make. All you have to do is process the cookies, and then you mix in the sugar and butter. I think there needs to be a little more butter because my crust was still crumbly, but maybe that's just me. Spoon the crust into the cupcake liners and press down on the crusts with the bottom of a cup.


Subscribe to:
Posts (Atom)