Showing posts with label frosting. Show all posts

Wednesday, October 3, 2012

Red Velvet and Light Cheddar Cheese "Ombre" Rose Cake

The month of September is always a busy one for me.  Lots of my friends have their birthdays in this month.  This week it was my grandma's birthday on Sunday, then Tuesday was my uncle's birthday, today is my dad and K's birthday, on Friday is my best friend's birthday and on Saturday is another close friend's birthday.  So many people I know are born in this month!

This year was my grandma's 80th birthday.  So in order to celebrate this significant event, my parents and close relatives decided to have a surprise birthday party for her.  After several weeks of planning, the special day finally arrived.  For my grandma's birthday, the reception was held at my Uncle's church and several trays of food were ordered from a buffet.  Around 40 relatives showed up to celebrate her birthday.  Because it was a surprise party, my mom and I had to trick my grandma into getting on the car with us so we could bring her to the place.  My mom told her that she needed help with choosing some meat at the supermarket to barbeque.  At first, my grandma argued that it was too late to bbq meat among other things, but then after my mom's persuading she finally relented.  Then I had to bring this cake onto the car and because this cake was too difficult to put into a box or container, I had to hold it on my lap.  Bringing a cake on the car was suspicious because my grandma had no idea that there was going to be a surprise party, so I had to make up a story of how I wanted a special decoration for the cake and we needed to go to this particular store to buy the decoration.  Luckily, she fell for the story.  When we finally arrived at the church, everything was revealed to her and she had a blast at the party.  She was really happy and that was awesome.  All the lies were worth it. ;)

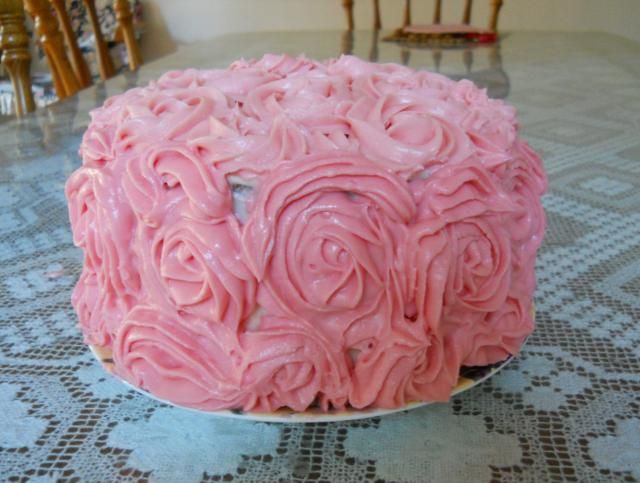
In order to celebrate her special day, I decided to bake a cake for her.  I quickly found this recipe on Honey Bee Sweet's blog.  It was not a hard decision to make because I had seen a few ombre rose cakes on tumblr and I really wanted to try making that type of cake.

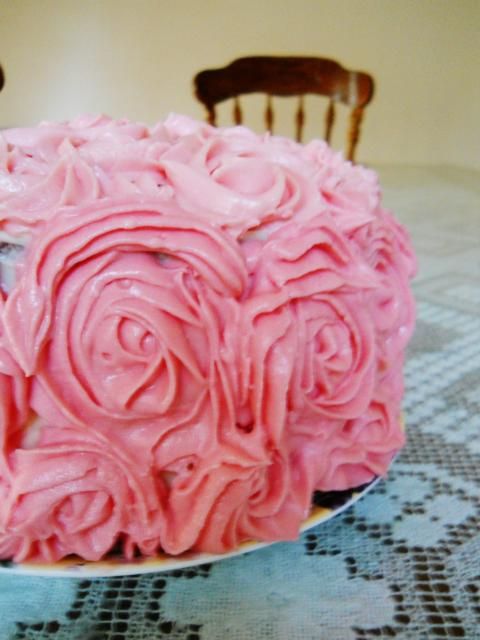
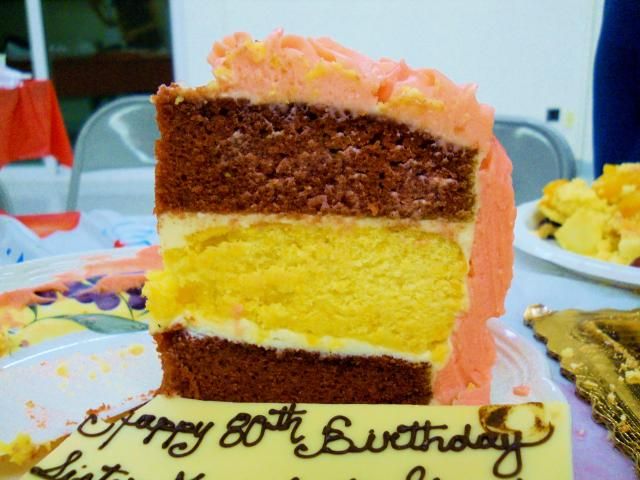
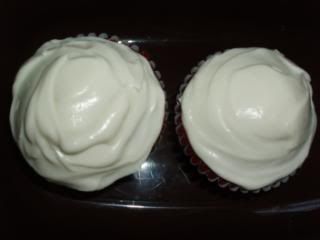
Although this cake took me around 4-5 hours total to make it, it was worth it.  The cake is delicious!  Although I kind of messed up on the cheesecake part, many people still complimented me on the cake, saying that the cake tasted amazing, etc...  Also, the roses on the cake really impress people.  However, mine were a bit sloppy because of the hot weather and my hot hands.  At one point, the frosting was so soft that it wouldn't stay on the cake and slid right off like this.  In addition, I wasn't able to make my cake an ombre rose cake.  I was able to make it two different colors, but ran out of time to tint the frosting darker. 

Red Velvet and Light Cheddar Cheese "Ombre" Rose Cake
Recipe from Honey Bee Sweets.  Please refer to her blog for the recipe.
Photobucket

Photobucket

Photobucket

Photobucket

Monday, September 17, 2012

Funfetti Cupcake

So remember how I was supposed to post all my recipes from the Crazy Day?  Well, I haven't finished posting all those recipes yet.  One of the things I made on that day was funfetti cupcakes.  They turned out surprisingly well, even though they were the cupcakes that required 3 egg whites and I typically don't do so well with recipes that require egg whites.  Anyway, I didn't take any good pictures of the cupcake and only got a picture of a half eaten one. :P  So yesterday I decided to make some funfetti cupcakes again, except with a different recipe.  Something I didn't like about the first funfetti cupcakes I made was that they were too sweet.  In fact, they were sickening sweet.  Unless you have a major sweet tooth, you will not like that cupcake.  I'm really happy with the funfetti cupcakes I made this time though.  They were soft, moist and not too sweet.  I also made some frosting that turned out alright.  The cupcakes look really cute with the sprinkles in them.

Funfetti Cupcakes
Recipe from Sweet Tooth
Photobucket

Photobucket

Thursday, September 6, 2012

Black and White Cookies

I always wanted to try making black and white cookies, but I never got the chance to because these cookies are very time consuming.  When I finally made these cookies, I was a little surprised at how cake-like the batter was.  Also, the cookies were easier to make than I thought they would be.  The hard part was frosting the cookies and making the chocolate frosting.  Because of the chocolate frosting, I spent around 3 hours, hands on, making these cookies.

These cookies were pretty good.  You'll like them if you like cake-like cookies.  The only downside of these cookies was that the icing was really sweet...and I put a really thick icing on these cookies when I was trying to make sure the icing looked perfect.  So I guess if I ever make these cookies again, I will spread less icing onto the cookies.  Also, one problem I encountered was the texture of the chocolate icing.  I don't know what I did wrong, but not only was the icing not very pretty, it was also really, really hard to spread.  I spent around half an hour trying to get the icing to the right consistency, but it still ended up different from the white icing.  In the end, I was extremely frustrated and vowed that I would never make these cookies again because icing these cookies was just too time consuming.  We'll see if I keep that vow. XD

I actually made these cookies for my brother because he wanted to bring some treats for his band council.  After he came back from his band activity, he told me that many people enjoyed the cookies.  However, there was one guy who said that my cookie batter was not mixed well enough...  :(  My brother consoled me by saying that the guy who said that was a very critical person, hahaha.

Black and White Cookies
Recipe from Simply Sifted.

Actually I have the hard copy of this recipe in my America's Test Kitchen Family Baking Book, but I found the recipe online already so I will just give you the link instead of retyping up the same recipe.

Photobucket

Photobucket

Monday, February 20, 2012

The Crazy Day

So every week at church, after service, there is a snack area called Sonlit Terrace. Every week people take turns bringing muffins, croissants and similar items.  Since it was the summer, I decided to sign up for bringing the snacks one day.  It was going to be a great excuse for a baking challenge.   I was so excited! I didn't decide what I wanted to make until a few days before and it was a hard decision.  I ended up with eleven things I wanted to make.

The items I made were:
Oreo cheesecake bites
Oreo cupcakes
Green tea cookies
Lofthouse sugar cookies
Chocolate chip cookies
Espresso shortbread
Double chocolate chip cookies
Funfetti cupcakes
Cheesecake brownies
Glazed lemon cookies
Almond biscotti

I will be Posting each recipe one by one because it would take forever to post all of it at once.  Here is a preview of all the things I made.

Photobucket
All these things took me 11 hours to make.  I was in the kitchen for the whole day baking. It was fun, but tiring.  With my brother's help I was able to frost the cookies and clean up without sleeping too, too late.  After my baking spree was over, I was soo tired that I couldn't fall asleep.

Photobucket
The end product. :)

Monday, December 26, 2011

Oreo Swiss Roll Cake

Merry Christmas everyone!  I hope you all had a great time spending your day with family and friends.  There are many things to be thankful for, especially Jesus' birth.  I can't believe the year passed by so fast and we are quickly nearing the end of 2011 and the start of 2012!  I hope you all have a great last few days of 2011.

Since it is Christmas, I thought it would be fitting to post a recipe for an Oreo swiss roll cake because it resembles the yule log cake that is popular during this time  I have always wanted to make a swiss roll cake, but the thought of rolling up the cake and having it crack always deterred me from making this cake.  In addition, the many eggs that this type of cakes requires always scare me due to my fear of messing up the cake and wasting the ingredients.  However, I finally made this cake due to a carton of heavy cream that needed to be used up and a dinner party that I was going to attend.  I easily found the recipe for the Oreo swiss roll on Honey Bee Sweets.  (Btw, this post is alllll the way from September, Labor Day weekend.  I am sooo behind.)

This cake was easier to make than I expected.  I thought it would take around 3 hours, hands on, to make it.  However, I was able to finish making it in around 2 hours.  This cake turned out to be a pretty successful cake, ignoring the cracks that is.  I loved the texture, it was soft and spongy, not dense at all.  The oreo heavy cream filling sandwiched in the roll had a pleasant taste to it; it was mildly flavored and just right, not too sweet.  The oreos and cream tasted like cookies and cream ice cream, especially after you refrigerate the cake.

Here's the recipe for you to enjoy. :)  Thank you Honey Bee Sweets for sharing this delicious recipe!  I posted up a brief summary of the directions to help make my pictures more understandable.  Please refer to Honey Bee Sweet's recipe for the ingredients and better instructions. 

Oreo Swiss Roll
Recipe from Honey Bee Sweets
Photobucket

Photobucket

Wednesday, April 27, 2011

Hershey's Perfectly Chocolate Chocolate Cake

I made this cake for my brother's birthday (beginning of April). Originally, I wanted to make this old-fashioned chocolate cake from America's Test Kitchen, except seeing all that butter made me change my mind. Instead, I chose this recipe that used the healthier vegetable oil for making a moist chocolate cake. This cake was so good that my family requested for another one the next day. So I made another one, and used some of the leftover frosting to frost part of the cake. I made the second cake with my friend and it only took a few minutes to whip up. It's always nice to have a helper when baking. :)

Because I baked two cakes at the same time, I had to put the cakes into the oven side by side. What happened was that my cake was puffier on one side than the other one because the sides of the cakes that were in the middle of the oven did not rise as much. To solve this problem, you can rotate the pans halfway through baking, or you can just match up the puffy side and unpuffy side of the two layers and make an evenly leveled cake.

This was my first layer cake ever and I was so excited to frost it. It was so easy to make. In fact, this recipe reminded me of the easy chocolate cupcakes I made before. Also, after tasting this cake and looking at it, I was reminded of that humongous chocolate cake in Matilda, the movie. I don't know if you ever watched it, but in the movie and the book, this boy was forced to eat a whole chocolate cake by the mean principal.

I was inspired to make this cake when I saw it here.

Hershey's Perfectly Chocolate Chocolate Cake
Recipe slightly adapted from Hershey's
Photobucket

Photobucket

Wednesday, August 25, 2010

Cream Cheese Frosting

Cream cheese frosting is a great companion to red velvet cakes. This frosting melts on your tongue and is very easy to make.

Cream Cheese Frosting
Recipe from America's Test Kitchen Family Baking Book
Note from the book: do not use low fat/nonfat cream cheese b/c the frosting will become too liquidy. The frosting won't be good on a 3 layer cake because it has a softer and looser texture compared with other frostings. Also, if the frosting is too soft, just refrigerate until firm.
Makes 3 cups (enough for 24 cupcakes)

Ingredients
12 ounces cream cheese, softened
6 tbsp unsalted butter, cut into chunks and softened
4 tsp sour cream
1 tsp vanilla extract
1/4 tsp salt
1 3/4 cup confectioner's sugar

Directions
In a large bowl beat together everything except the confectioner's sugar, aka powdered sugar on medium high with an electric mixer until the mixture is smooth.

Reduce speed to medium low and add in the powdered sugar and beat until smooth. Adjust speed to medium high again and beat the frosting until it is light and fluffy.

Frosting can be refrigerated in airtight container for as long as 3 days. When ready to use, put frosting in room temperature until softened ~1 hour and then whip again with beater (medium speed) until smooth ~2 minutes or less.


Note:I quartered the frosting recipe because I was only planning on frosting like 6 cupcakes or so, but I was able to frost 8 cupcakes.

Photobucket

Photobucket
The texture of the frosting. Very light and fluffy. I think I forgot to take any other pictures, oops. But the instructions are very easy to follow, so no worries.

Photobucket
The frosting was enough for 8 cupcakes. The picture only shows 7 frosted cupcakes, but my brother ate one. :3

LinkWithin

Related Posts with Thumbnails