Monday, November 29, 2010

Sour Cream Pound Cake

So, I just baked my first pound cake today. (10/24/10) In fact, I am typing this post as it's baking in the oven right now.

I can't believe how it's already the end of October! Wow, then it's going to be November and then I will have to send in my college apps. These days I really wanted to bake some bread, especially some bread with matcha. However, my kitchen scale was not functioning even after I changed the batteries. Then one day I tried looking at the scale again and it worked. Whewf...I was so worried that my scale broke. It does use up batteries quite fast though.

I made this pound cake for English class because we just read the book Frankenstein, and now we have a non-fiction research project. I decided to do one on food during the Romanticism period. I discovered that pound cakes were created during the 1700s and that they are called pound cakes because of the simplicity of the ingredients. A pound of butter, sugar and butter along with some eggs would give a pound cake. Back then, most women couldn't read so just memorizing the ingredients by pounds made it much easier for them to make pound cakes.

Then I immediately thought of Von's recipe. She shared this beautiful pound cake recipe on her blog. It looked amazing! The texture was perfect and everything, so I just had to make it. I was a bit doubtful of how mine would turn out and I didn't get to try the recipe out until today because I ran out of yogurt/sour cream.

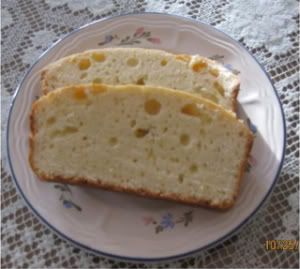
However, after making it, it wasn't that bad. I was worried mine would not turn out because I have very few successes on baking cakes. Luckily for me, the batter was pretty thick and it smelled really good. The only sad part was that there were a lot of holes in my pound cake.... it didn't look like Von's pretty, tight crumbed, yummy looking cake. I'm guessing that I might have overbeaten the eggs and incorporated extra air into the batter, causing the little holes. Please correct me if I'm wrong though.

Sour Cream/Yogurt Pound Cake
Recipe from Vondelicious who got it from the Better Homes and Gardens Cookbook
Photobucket

Thursday, November 25, 2010

Thanksgiving

Today's Thanksgiving! Happy Thanksgiving everyone.

Things I'm thankful for:
My family for always being there for me and bearing with me too, my friends, God, my house, my school, my material things, my blog, my blog supporters, my life. I'm pretty much thankful for everything I have because I know that I'm very lucky. Not everyone is able to have what I have. I don't need to worry about not having a place to live, no food to eat, or just any basic necessity, I have them all. I'm thankful for my dad for working so hard to support our family, my mom for doing the housework and cooking for us. My parents for being so patient with me every day, even if I'm in a bad mood. My brother for being nice occasionally and annoying most of the time. :P My aunt and uncle for being so generous and kind. My cousins for being so funny, maybe a little annoying too, but still. My best friends for always listening to me. I'm thankful for many more things too.

I'm so thankful that I started this blog. If I didn't I wouldn't have known quite a few nice bloggers too. I really appreciate everyone's niceness to me and encouragement. :) Happy Thanksgiving everyone.

Photos of the turkey are going to be posted soon.

Wednesday, November 24, 2010

Caterpillar Bread

I have been so busy with school and college apps recently, but now it's Thanksgiving break! I plan to turn in my college apps on Friday and from then on I will be blogging much more often. Also, marching band has come to an end...forever. No more high school marching band! I'll miss it so much. However, there are some advantages of that: sleeping in one hour and having more time to do homework.

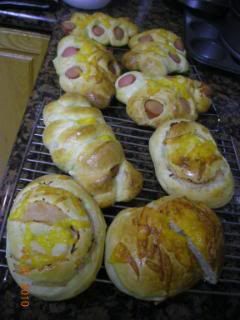
I have always wanted to try baking the savory bakery breads for lunch and I finally got around to it. (11/7) I found the recipe on Sugar & Everything Nice. Looking at the beautifully twisted hot dog bread made me want to bake this bread really much. The only problem was that I didn't have any hotdogs. Well, that problem was soon solved after I went to the market to buy some. I always knew hot dogs were bad for you, but after seeing the nutrition facts I am so shocked and disgusted. One hot dog has around 30% dv of fat! That's terrible, however, moderation is key.

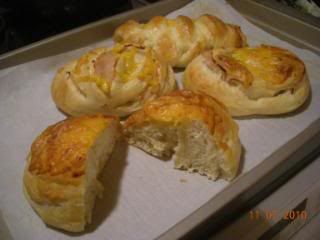
I was able to make this bread while overcoming a few minor problems. One of them was the temperature in my house was too cold. I thought I killed the yeast because the dough hadn't risen even after 1 hour. With the dough, I made 8 big buns instead of the suggested 22. They turned out as big as my hand. In terms of texture, they were really good fresh from the oven. However, after freezing it, you can't just unfreeze it and eat it, you have to rebake it in order to get a good texture, otherwise the bread will taste really dry and icky. (I think this is the case with all bread, but still.) I thought the bread was a bit too salty, so next time I will adjust the salt content. Everything else was fine I think.

Caterpillar Bread
Recipe adapted from Sugar&Everything Nice.
I made 8 pieces of bread.

Photobucket

Photobucket

Photobucket

Sunday, November 14, 2010

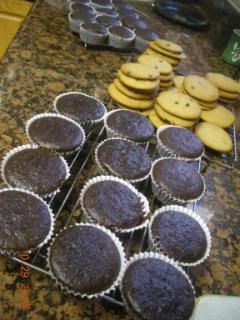
Easy Chocolate Cupcakes

I finally decided on which camera to get! I kept my Nikon L22. It's working out pretty nicely.

I made these cupcakes yesterday (10/29/10) and they were really easy to make. At first, I was a bit confused about the instructions because the instructions said to whisk liquid into flour ingredients, I wasn't sure if we were supposed to pour the whole thing in the large bowl and whisk or add a steady stream of liquid while mixing.

The problems I encountered during the process of making this cupcake was I lost count of how many 1/4 cups of cocoa powder I had added in. I seem to be pretty absentminded these days! I couldn't even remember if I had put 2 or 3 quarter cups. As a result, I just had to end up kind of guessing how many cups I had put in the mixing bowl.

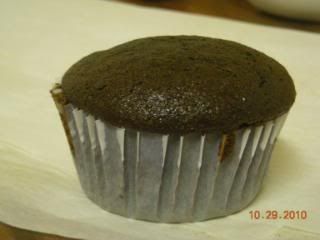
The batter wasn't as runny as I thought it was going to be. The cupcakes baked on the top rack rise higher than the ones baked on the lower rack. After they have baked for half of the required time, the middle of the cupcake might look like it's sunken, but if you wait until the timer goes off, they will be fine or a bit flat, depending on the rack you bake the cupcakes on.

The cupcakes were moist and they had a very loose texture. Soft and not too sweet.

Easy Chocolate Cupcakes
Recipe from Baking Bites
Photobucket
3/4 cup unsweetened cocoa (I forgot how much I used)
1 1/2 cups all purpose flour
1 1/2 cups white sugar (I used 1 1/3 cups sugar)
1 1/2 teaspoons baking soda
1/2 teaspoon baking powder
1/2 teaspoon salt
2 large eggs
3/4 cup water
3/4 cup buttermilk
1/3 cup vegetable oil or melted butter (I used vegetable oil, it made life so much easier)
1 tsp vanilla extract
2/3 cup mini chocolate chips (I didn't use any)

Preheat oven to 350F. Place liners in 2-12 cup muffin tins.
In a large bowl, whisk together cocoa, flour, white sugar, baking soda, baking powder and salt until thoroughly mixed.
In a medium bowl, whisk together eggs, water, buttermilk, vegetable oil and vanilla extract. Whisk into flour mixture until all of the ingredients are mixed in and no streaks of flour remain. Add in optional mini chocolate chips, if using.
So basically I just added a little bit of the wet ingredients into the dry ingredients and started mixing, then I realized it's ok if I poured the whole thing into the large bowl and continue whisking then. So yea, I ended up pouring the entire contents of the medium bowl into the large bowl instead of whisking in little by little. I'm not always the best at interpreting instructions so maybe I just over thought it.
Fill muffin cups evenly with the prepared batter.
Bake at 350F for 15 minutes, or until a toothpick inserted into the center of a cupcake comes out clean, or with only a few crumbs.
Remove cupcakes from the pan and cool completely on a wire rack before frosting.

Photobucket
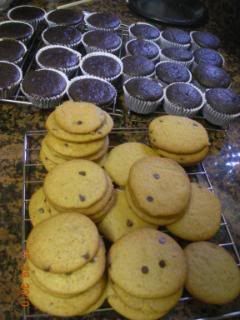
I made my thin and crispy cc cookies again. Actually, I made both of these things for a band comp that was the next day.

Photobucket
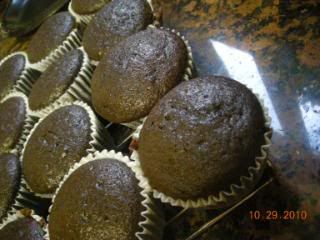
A close up pic.

Photobucket
One of the cupcakes that was baked on the higher rack.

Thursday, November 11, 2010

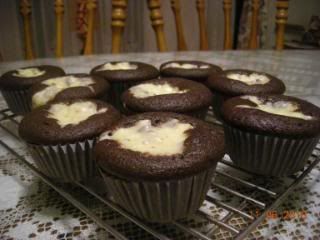
Black Bottom Cupcakes II

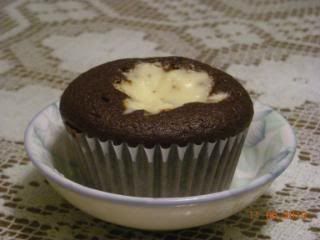
After debating for quite a while about what to make today, I decided to make these black bottom cupcakes. I found the recipe for these cupcakes on Brown Eyed Baker, who got the recipe from David Lebovitz.

I actually made these for my brother because it's his turn to bring snacks for Bible drill, a church activity that he participates in. Bible drill is when people memorize Bible verses and then they try to flip to that verse as fast as possible, under 7 seconds. Anyway, he initially requested that I make red velvet cupcakes...but I was too lazy. Last time I made red velvet cupcakes, they took me two whole hours, including cleaning up. In the end, I decided that I wanted to try out this recipe because the last time I made black bottom cupcakes, they took forever to bake and did not turn out the way I wanted them to. By that, I mean that they made me really worried when they were still uncooked when the time was up.

Here's my verdict. The cake part was nice and moist. It may be dry if you peel off a chunk and let it sit there for a while before eating it, but if you leave it whole and you eat it then it is moist. It was just right in terms of sweetness, not too sweet but enough so that it was enjoyable.

For the cream cheese portion, I didn't soften it enough so there were little lumps of cream cheese. This did not adversely affect the taste, just the texture, which was not as smooth. However, the cream cheese portion was still pretty good. Interestingly, the chocolate chips melted on your tongue when you take a bite of it. Creamy and rich=very yummy. I ate a half of the cupcake and almost couldn't resist eating the rest. Serve cold because they taste better that way.

Black-Bottom Cupcakes
Recipe from David Lebovitz The Great Book of Chocolate, found on Brown Eyed Baker.
Makes 12
Photobucket
In a group.
Photobucket
For the Filling:
8 oz. cream cheese, at room temperature
1/3 cup granulated sugar
1 large egg, at room temperature
2 oz. bittersweet chocolate, coarsely chopped (or semisweet chocolate chips which was what I used.)

For the Cupcakes:
1½ cups all-purpose flour
1 cup firmly packed light brown sugar (I used dark brown; I didn't have any light brown sugar)
5 tablespoons naturally unsweetened cocoa powder (not Dutch-process)
1 teaspoon baking soda
¼ teaspoon salt
1 cup water
1/3 cup unflavored vegetable oil
1 tablespoon white or cider vinegar (I used apple cider vinegar)
1 teaspoon vanilla extract

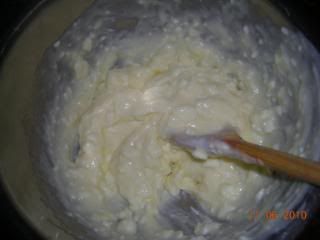
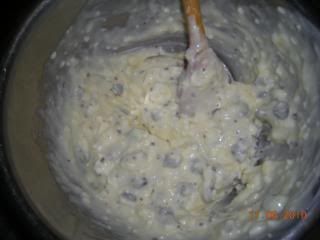
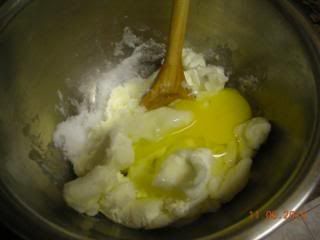
Make the Filling: Beat together the cream cheese, granulated sugar, and egg until smooth. Stir in chopped chocolate pieces. Set aside.
Photobucket
A bit clumpy.
Photobucket
Chocolate chips mixed in.
Photobucket

For the filling, instead of using coarsely chopped bittersweet chocolate, I used semisweet chocolate chips that were kind of chopped. I attempted to make the cc smaller for a few minutes, until I realized that it would be a bit hard to accomplish. In the end, I just dumped the cc in the filling.

Also, I was too lazy to get out the hand mixer so I just manually mixed the filling, so it took longer than expected. My filling was also a bit clumpy because the cream cheese was not totally at room temperature.


Make the Cupcakes:
Adjust the rack to the center of the oven and preheat to 350°F (175°C). Butter a 12-cup muffin tin, or line the tin with paper muffin cups.

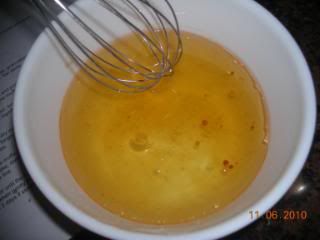
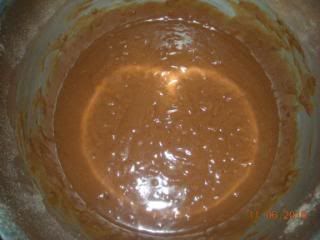
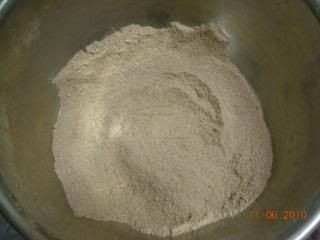
In a medium bowl sift together the flour, brown sugar, cocoa powder, baking soda, and salt. In a separate bowl mix together the water, oil, vinegar, and vanilla.
Flour, brown sugar, cocoa powder and baking soda.
Photobucket
Oil, vinegar and vanilla.
Photobucket
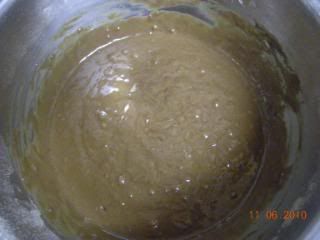
For the cupcake batter, when the instructions said to sift together the flour, brown, sugar and etc... I thought it was a bit weird. For me, the brown sugar would not fit through the sifter so I just dumped it in a large bowl. Then I proceeded to sift the flour, cocoa powder, and baking soda together. I just sprinkled the salt into the dry ingredients because I use coarse salt.

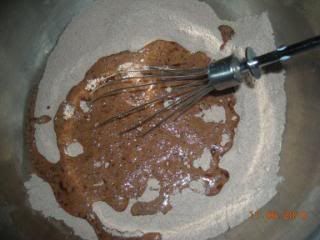
Make a well in the center of the dry ingredients and stir in the wet ingredients, stirring just until smooth. Stir any longer and you will over mix the batter and end up with less-than-tender cupcakes.
Photobucket
Photobucket
There was a little glare in the picture.
Photobucket
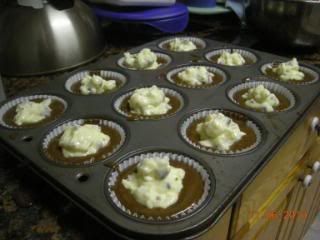
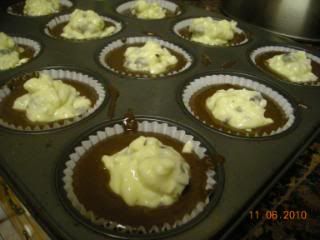
Divide the batter among the muffin cups. Spoon a few tablespoons of the filling into the center of each cupcake, dividing the filling evenly. This will fill the cups almost completely, which is fine.
Photobucket
A lot of cream cheese for each one.
Photobucket
Bake for 25 minutes, or until the tops are slightly golden brown and the cupcakes feel springy when gently pressed. These moist treats will keep unrefrigerated for 2 to 3 days if stored in an airtight container.

I baked my cupcakes for 25 minutes and they were done! Yay! Also, the cupcakes did feel a bit springy when pressed down on.

Oh yea, it took me a total of one hour to mix prepare the cupcakes. I was just getting the feel of it, I'm sure that the next time I make these, it will take around 30 minutes or less.
Photobucket
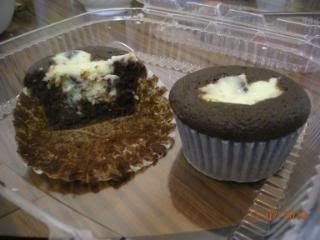
The two leftovers from Bible Drill.
Tuesday, November 9, 2010

Baked Nian Gao 烤年糕

Sorry for not posting for such a long time. I did bake these past few weeks, I just have not been able to get the pictures that I took because I borrowed my Uncle's camera. Recently, some things I made are black bottom cupcakes, hotdog buns, chocolate cupcakes, thin and crispy chocolate chip cookies, Von's pound cake!, and that's about it. I'm going to post about Von's awesome pound cake soon, as soon as I get the single picture for it. I'm also going to get a new camera soon. Actually, my mom bought one for me already, but I'm not sure if that is a good model or not so I'm still deciding. I'm debating between getting a Nikon Coolpix S4000, Canon PowerShot SD1300IS or keeping the Nikon Coolpix L22. Any suggestions? My favorite color is pink, but I don't know which camera is better. I'm getting sidetracked now... anyway back to my post about nian gao. By the way, thanks for reading that super long paragraph.

My mom used to make this for our family when I was little, back in elementary school. I remember coming back from school and finding this cake in the kitchen. After seeing it there, I would always be so happy. Then after a while, she stopped making it. I just recently asked her why and she told me that she had made it so often that everyone got sick of it. I also found out that back then, everyone was making it because it was really easy to make, really cheap, and a great gift for people. A gift as in when you're visiting someone, someone's sick, etc etc. I really missed eating this cake and didn't make it until now (Oct 31). I don't know why it took so long for me to ask my mom for the recipe, but here it is. I hope you enjoy the recipe. :)

So after making it, I ate around 1/4 of the cake. Ekks, pretty scary! It was sooo good and I did not eat it for such a long time that I couldn't control myself.
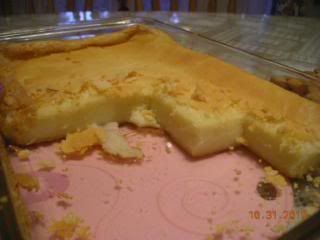
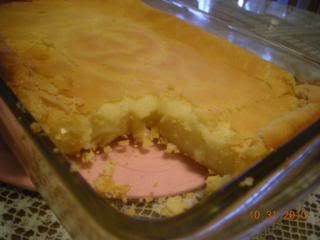
The crust tastes crispy and the middle is chewy, just like mochi. So a crispy crust with the chewy inside balances everything out and makes a great "cake"! In terms of sweetness, it was just right. It was not that sweet, so if you like really sweet dessert, you might want to add a little more sugar.

Baked Nian Gao 烤年糕
Recipe from my mom's friend
Photobucket
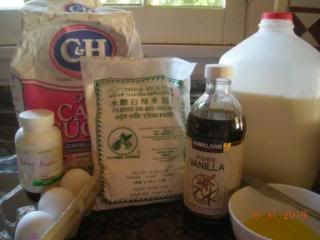
1 lb glutinous rice flour
1/2 cup sugar
3 Eggs
1 tsp baking powder
1 tsp vanilla extract
2 1/2 -3 cups milk (Add more milk if you want it to be softer, less if you want it to be chewier. I used 2 1/2 cups milk)
1/2 stick butter, melted
Photobucket
Toppings: red bean paste, walnut, raisins (Optional)

Bake at 350*F for one hour.

Easy way: Dump all the ingredients in one bowl and mix together until uniform. Pour into a 9x13 pan and bake at 350*F for one hour.
Photobucket

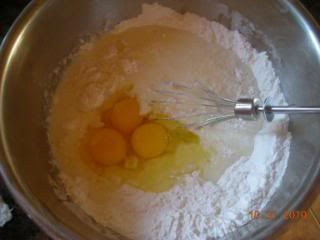
What I did: Whisk together the glutinous rice flour, sugar and baking powder in a large bowl. Melt the butter and warm up some milk. Mix the butter, vanilla and some milk together and add into the large bowl. Add the rest of the milk and then add the 3 eggs. (I did this so that way the butter would not solidify due to the coldness of the milk. Of course, it would not matter if your milk was at room temperature though.)
Photobucket
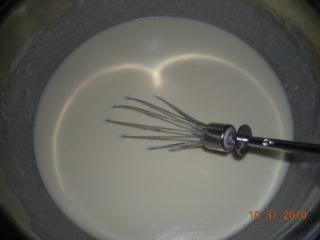
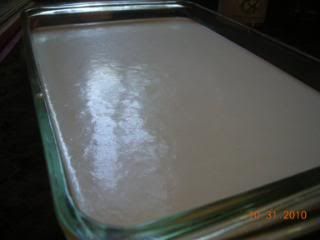
Whisk everything together. Keep on whisking until the batter is smooth and there are no lumps. Pour batter into a oiled glass pan. I don't know how it will turn out with a metal pan, but you can try.
Photobucket
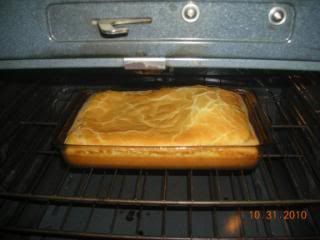
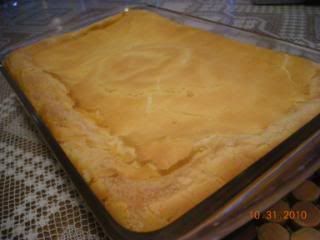
Bake at 350*F for one hour, so that the crust become golden brown and puffy. After that, take it out of the oven and cool or eat it while hot. :) The cake will deflate a bit, but that's normal.
Photobucket
Btw, you can half the recipe and bake in a smaller pan.
Photobucket
It deflated!

Photobucket
I got a few pieces.

Photobucket
My family ate a few. So quickly eaten! This was on the same day. Within a few hours too. Everyone missed the nian gao.
For the toppings, sprinkle raisin and walnuts into the batter if you want some.

For red bean paste, my mom said you are supposed to bake it for around 1/2 hour and then somehow spread the red bean paste onto it and then put it back into the oven to continue baking it for another 1/2 hour. My aunt's sister also made this variation before and I think what she did was put a portion of the batter inside, bake, add red bean and pour the rest of the batter on and finish baking. I'm not 100% sure though. If you feel adventurous, do try it out and tell me how it goes. Thanks :)

Serving suggestion: Cut into squares and serve. If a day or 2 passes and the cake is not finished yet, very unlikely but possible, just get the portion you want to eat and microwave for a few seconds to achieve the nice, chewy texture.

LinkWithin

Related Posts with Thumbnails