
I've always wanted to try making the mantou my dad made. It was always a treat whenever he made them. When he hasn't made them for a long time, I would request for them, dropping hints. :D One day I tried learning from him. Except, my family usually cooks without measuring. So I tried the best that I could to get the recipe and below is my sad attempt of remembering his recipe...
Well before that, I decided to try out Angie's recipe in the meantime because I was craving mantou. I feel like I would be able to eat mantou for breakfast, lunch and dinner, without getting sick of it. As I mentioned many times before, I love eating carbs! :D I really would eat that much mantou if it was healthy for you, but it isn't....too much processed flour. Ok, anyway, I found her recipe a long time ago, before I even started blogging. Back then, I did not know much about breads. If you asked me to make mantou last year, I would be confounded.
The bread turned out sooo soft! And it had skin! You can tell how excited I was. lol That type of mantou is my favorite. Now, next step is to make this wheat mantou, but still keep this nice texture. The only downfall was my baking soda not being mixed well enough....leading to these brown splotches. I also learned that adding sugar and yeast creates alcohol and mixing baking soda with this alcohol may cause brown spots. In my case it was brown swirls. Maybe next time I won't add sugar to my starter to see if the brown splotches still happen.
Chinese Steamed Buns with Starter
Adapted from Angie's Recipes

Uploaded with ImageShack.us Photobucket is maintaining their website now, so I'll just use imageshack for the time being.
185 g starter
280 ml Warm milk
672 g All-purpose flour
1.68 g (1/2 tsp) Active dry yeast
1/2 tsp Salt
1 tbsp + 2 tsp vegetable oil
½ + 1/3 tsp Baking soda
Extra flour for kneading, around 5 tbsp total (1/2 tbsp each mantou)
Starter dough:
100 g all purpose flour
65 g water, or more if needed
3 gm active dry yeast
A pinch of salt
1 tsp sugar
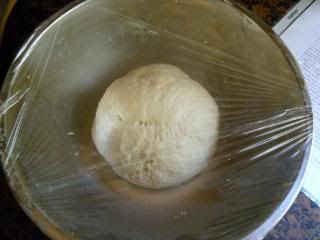
Before

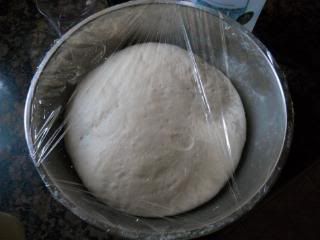
After a couple hours (there should be tiny bubbles)
Mix all the ingredients together to make a dough, adding more water if needed until the dough comes together. Knead until smooth. The dough should not be sticky, a little tacky, but not sticky. Cover with plastic wrap and let the dough rise for a couple of hours at room temperature.
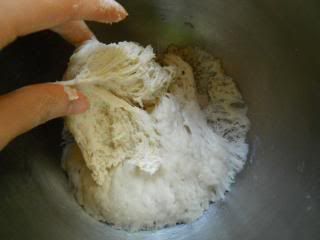
After a few hours, the starter dough will become sticky like this.
Proof the yeast in a warm bowl of milk, just until the yeast dissolves. In a large bowl, add flour, the starter torn into small pieces, salt, oil, and the milk. Knead the dough until it becomes smooth and elastic, passing the window pane test. Also, depending on the weather, more or less milk may be needed.
I added milk little by little, in increments and kept on kneading the dough until I felt that the dough was soft enough.
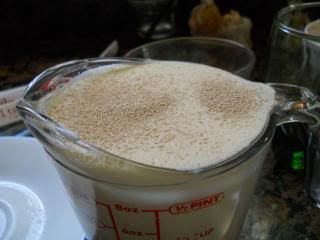
I poured the milk all the way to the top because I wanted it to be enough.
Knead flour, oil, and starter dough together.
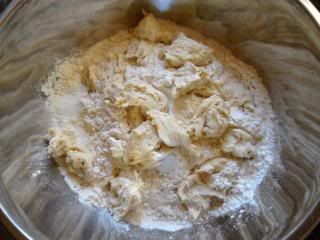
Add the yeast and milk, kneading until very soft.
Proof.
Cover the dough with plastic wrap and let it rise for 3-4 hours at room temperature. If you’re in a hurry, feel free to let it rise in the preheated oven (preheated for ONLY 2 minutes, otherwise your bread will develop a crust) Oh yea, spraying water inside the oven might be a good idea :)
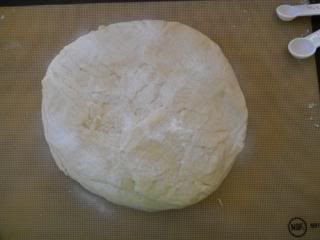
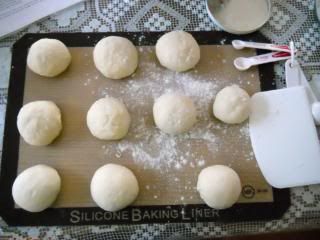
After the long rise, dump your dough on a floured surface. If you have a silpat, feel free to use that. I didn’t need to sprinkle flour on my “silpat”. Sprinkle baking soda evenly over the surface of the dough. Knead in the baking soda and shape the dough into a log and divide it into around 10 pieces. I don’t know about you, but I like big mantou.
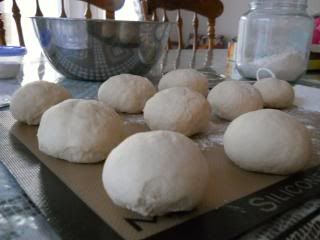
Now, shape the pieces into balls and flatten them a little. Sprinkle a generous amount of flour on the dough. Fold the piece of dough in half and press down to enclose the flour inside. Rotate the dough a bit and fold in half again. While holding the dough with your right hand, stick your left thumb into the middle of the dough, making a dent. Use your right hand to press down on the other side, kind of making a sandwich. Anyway, just do this to make the ball round and create layers within the mantou. This was what I learned from Angie. I never knew that this was what you had to do to make delicious, layered mantou. If my instructions confused you, please look at Angie’s instructions, they make more sense.
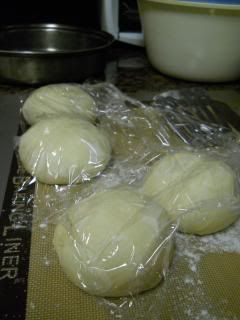
So after the pieces are shaped into balls, place them in a tray, cover with saran wrap and let them rise until doubled in size.
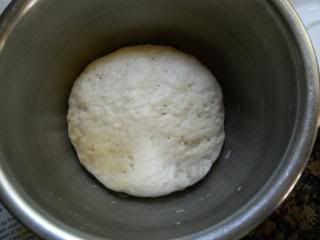
Then doubled in size...
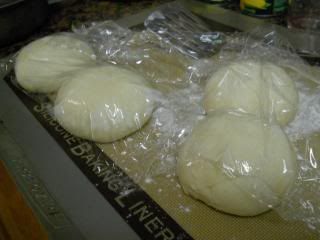
they look very soft and pillowy.
I let them rise for 30 minutes in the slightly preheated oven. Instead of repeating the process of folding in the flour, I just boiled water and started steaming my mantou. I just couldn’t wait any longer. Also, I didn’t want to fold any more flour into my mantou. I was scared that the mantou wouldn’t take anymore flour.
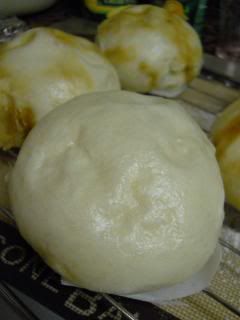
Boil water to steam the buns. After the water has boiled, place the buns onto the steamer and steam for 20 minutes on medium high heat. The water should be continually boiling.
One of the prettier mantou.
My Dad's estimated recipe - just a nice memory to keep :D
Ingredients
1 finger down, 80% full of flour around 6 4/3 cups
1 1/2 cup milk
1/2 tsp of yeast
1 1/2 cup of water
1 1/2 cup of water
1/4 cup more water
1. Get the milk, if it is cold, microwave it for 20 seconds or until it is room temperature or warmer.
2. Add the yeast to the milk and stir so that the yeast will be submerged in the milk.
3. Add to flour, add water, add water, mix.
4. Knead the dough until it is elastic
5. wait for it to rise
6. after it rises (doubles in size), punch it down.
7. Let it rise (double in size), punch down.
8. Let it rise, punch down
9. Add 1/4 cup of flour, knead it in and then let the dough rest for a little while before shaping the buns or making the baozi.
10. Knead the ball of dough in flour and make it a mantou.
11. For Baozis get a ball of dough and roll it out into a circle, add the filling, fold it up by making pleats.
Afterward, let rise for 1 1/2 hour, then steam for 20 minutes.
Good job, Esther! And also thanks for sharing your dad secret recipe. haha... Really appreciate it. Hope you're enjoying your day.
ReplyDeleteBlessings, Kristy
The mantous look really good! Can't wait for your step-by-step photos before trying them out since I work best with photos :p
ReplyDeleteOh wow! This I have to try! Thanks for sharing this family recipe with us Esther! ;)
ReplyDeleteOhh nice, I'm excited to try out this recipe with Cordelia before she leaves! :) Thanks for sharing Esther!
ReplyDeletehaven't tried making mantou before but my grandma makes them all the time for me when i go back to Malaysia. her recipe is awesomeee but i don't know it :D
ReplyDeletelooks very smooth indeed! wow, your dad also knows how to make mantous?! thanks for sharing his recipe. have a great weekend!
ReplyDeleteKristy, Thank you. :) I wrote that recipe down a long time ago in a rush and now that I found a new recipe, I’m too lazy to rewrite it. Have a good week!
ReplyDeleteJanine, Me too! I love looking at photos before I make something because then I can know what the steps are like and get a feel of how the recipe should go. I’m so glad that photobucket fixed the issue and let me continue posting photos.
Honey Bee Sweets, ;) Because it’s a family recipe, it’s so nebulous. Jk. But really, you should try out Angie’s recipe, I made these several times in one week despite all the dishes I had to do afterward. They are worth it! Then I froze them and ate one for breakfast almost every day.
Grace, Yay! Tell me if you ever have any questions, maybe I can help. I can’t believe how soon she will be leaving. :( Tell me if you try it out too. Also, I got the shoes for the dress! I’m pretty excited. Thanks Grace!
grub, I can only imagine how good your grandma’s mantou tastes. If you ever get the chance to get her recipe, please do share it! Family recipes are the best.
Lena, I’m glad that they were able to turn out that way. I would have been soo disappointed otherwise, haha. Yup, my dad knows how to make mantous! In fact, the only reason I knew how to knead the mantou into balls with that technique is through observing his special kneading technique. (I recorded a video too, so that helped quite a bit.) Making mantou is quite interesting, quite unlike baked bread. Have a great weekend too! (Even though it’s half over. :( )