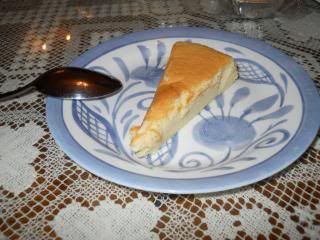
I decided to make this cheesecake for my own birthday instead. I was very, very worried because after my bad experience with sponge cakes, I surmised that cakes are not my thing. Especially cakes that require egg whites and egg yolks in order to make it all light and fluffy.
I made it through though!! After 2 hours spent in the kitchen mixing the batter and stuff, I accomplished mixing what seemed like a successful cake.
I ran into several problems along the way, which I will go into detail later in this post.
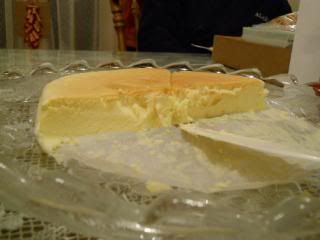
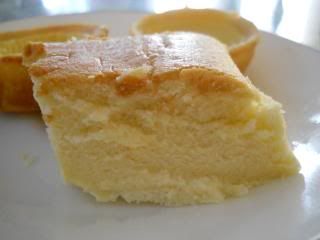
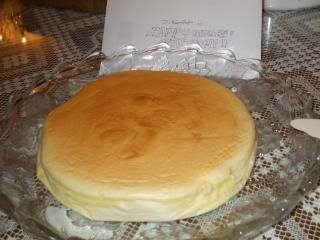
The cheesecake was tasty. My aunt, uncle and parents remarked that it tasted just like the one's from the Chinese bakeries. I have to agree. :) Thank you Wendy for this great recipe.
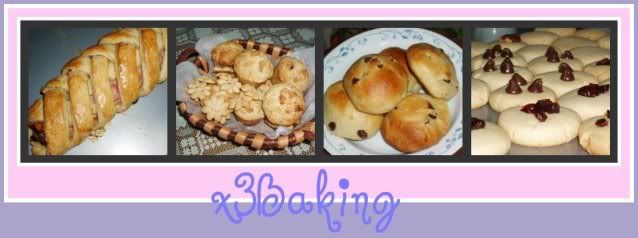
Japanese Cotton Cheesecake
Recipe from Wendy (Table for 2...or more)

Ingredients for a 9" cake pan
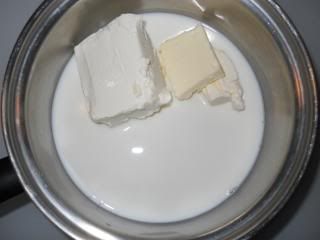
166 gm cream cheese
120 ml milk
20 gm butter
40 gm flour
32 gm cornstarch
4 egg yolks
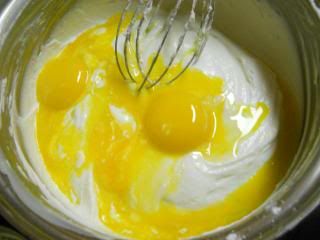
While separating the egg yolks and egg whites, some of the egg yolk dripped into the egg white. I was starting to worry again because I read somewhere that egg whites should not be "contaminated" otherwise it will be hard to get them all nice and fluffy.
I carefully used a small spoon to spoon out the yolk part and only tiny, barely noticeable traces of egg yolk were left. whewf...
4 egg whites
a pinch of salt
1/8 tsp cream of tartar and a few more pinches (I eyeballed it)
100 gm sugar
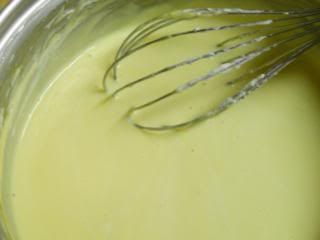
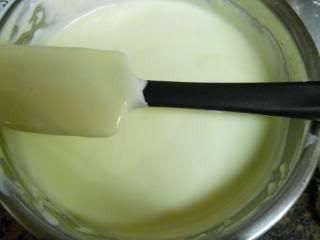
Cook cream cheese, milk, and butter on low heat in a heavy saucepan. Mixing the mixture until it is smooth and uniform. (I used a wooden spoon, a whisk would be easier)
Boil some water to prepare for the water bath
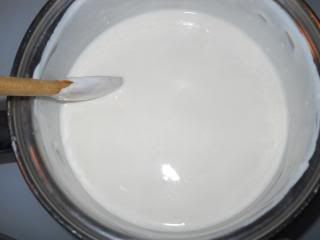
When the cream cheese mixture is warm, the flour and the cornstarch can be whisked in. Whisk the mixture until smooth.
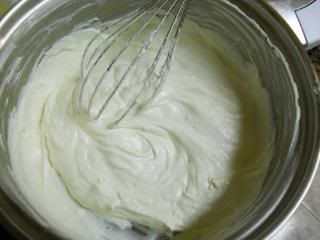
Add the egg yolks into the cream cheese mixture and whisk until uniform in mixture.
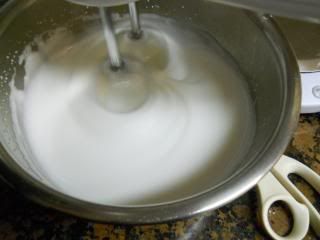
Beat egg whites until frothy in another CLEAN bowl. Add the cream of tartar and beat until the egg whites have soft peaks. Then gradually add in the sugar and beat until the egg whites are stiff, a soft droopy peak that will hold its form)
Now, mixing the egg whites... it took around 10-15 minutes to get it the way it had to be. I used cold egg whites.
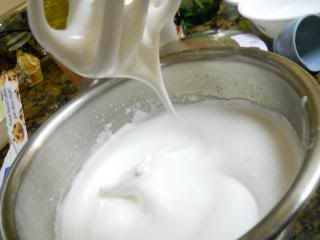
Fold in 1/4 of the egg whites into the cream cheese mixture. Then fold in another 1/4. Now, pour the cream cheese mixture into the remaining egg whites and fold.
While folding in the batter, I was very nervous because I was scared that the egg whites would deflate. I learned that you first add some egg whites into the other batter to kind of temper it. So that when you add it back into the egg whites, it's easier to fold together.

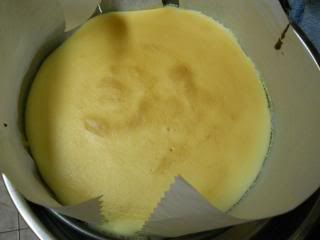
Pour the batter into a prepared pan.
I was planning to use a spring form pan, but
water leaked into it because apparently my wrapping technique was not up to par. As a last resort, I just used my regular 9 inch cake pan to bake this cheesecake in the water bath.
Bake at 320*F for around 1 hour or so, until the top is golden.
I had to bake this for around an hour because I used a 9 inch pan instead of the recommended 8 inch pan. I also increased the recipe by 33% as recommended by Wendy if I wanted to use a 9 inch pan.
Other variations:
1
2
3
you're not the only one bad with sponge cakes. i am most horrible at baking them. half of it is good, whereas the other half is chewy :/ sigh. i've asked my friend who bakes very good sponges and he gave me some advice. hopefully i'll make them again!
ReplyDeleteyour cheesecake looks really soft and yummy! i haven't tried this yet, so i might make it when i feel i have confidence :D
Esther,
ReplyDeleteGlad your family members enjoyed the cake.
If you're not confident with folding in egg whites, try it by using a hand whisk instead. A spatula will deflate the egg whites more.
Use the whisk to break the egg white clumps, and gently stir around. Use the whisk to break up mre egg white clumps and stir gently again.
Cheesecakes are never meant to be consumed warm. LOL. Be patient and chill it.
It's a bit moist, compared to regular cheesecakes. If you replace the milk with cream, the cake will be firmer and less wet.
But then again, the egg whites are a bit too soft. I understand that cold eggs are easier to separate than warm eggs, but warm eggs are easier to whip. Try whipping them to a stiffer texture and whip the whites over some very warm water if the weather is too cold. It'll give you a much fluffier cake if the whites are properly aerated.
Oh yes, you won't need such a high collar for the cake pan. It'll just disrupt the heat from reaching the top of the cake.
ReplyDeleteAnd your batter does look a lot runnier than mine. Maybe that's why it's dense.
hi esther, congratulations on the success on your cheesecake and happy birthday to you! after the success of this cake, i believe that it will boost up your confidence in baking cakes. keep it up , esther ..all of us are here for sharing and learn from each other.
ReplyDeleteLooks very cottony and delicious. I would love to try one day, too. Thanks very much for sharing. Wonderful that you got it right.
ReplyDeleteHappy Birthday Esther...though it is little late to wish you. Anyway the cake looks great to me especially sine it was your first time trying it out :) and Wendy has given you more tips :) so the next one would be better than this :))) Practice makes perfect !
ReplyDeletegrub, If you ever try making them again and they're successful, blog about them so I'll know what to do :) well, the plus side is that half of the cake is good. I don't know why mine deflates so much.
ReplyDeleteThank you! I'm sure that if I can make it, you can do it. You have more experience in baking than me! ;)
Hi Wendy, thank you for all the tips. I never knew that we could use a whisk to do this. Sounds like it's a great idea! I think I'll stick with the spatula, so that way I can improve my method and one day make cakes like yours. :) I never knew all those facts about the egg whites! I will take it all into consideration the next time I bake your cheesecake. Thank you for helping me out so much, I really appreciate it. It's really nice learning these things from you.
Lol, about the collar, I didn't want to shorten the paper's height because it was hard getting it to stand up straight. Also, I was rushing to get the batter in the cake because I have no idea how long I'm allowed to the let the batter sit there. Next time, I will make sure to prepare my pan first before making any of the cake batter.
Lena, thank you for your encouragement and birthday wish. I will try to bake more cakes from now on. That's what I love about blogging: learning from other bloggers.
Mary, Thank you and you're welcome. I really have to thank Wendy for sharing this in the first place because if she didn't share, I wouldn't have made this.
Elin, Thank you for your birthday wish, it's fine. :) I'm so excited to try it out again. I'll be sure to share my results the next time I make this cake. Thanks for your compliment.
Happy belated birthday Esther! Glad that your soft Japanese cheesecake turned out so nice. I am drooling looking at the soft fluffy texture, lol!
ReplyDeleteMy mom loves cheesecakes!!!
ReplyDeleteWill bake this for her soon.
xx
Mariska
The Baking Dummy
The slice from the cake looks cheesy and supple, isn't it!? Fortunate enough to be your aunt, uncle or parents.
ReplyDeleteHoney Bee Sweets, Thank you. :) You're so nice. btw, I received the pullman loaf tin that I ordered and I baked your marble chocolate bread with chocolate chips. It tastes very nice and I will write a post about it one day. Thanks for sharing that recipe.
ReplyDeleteMariska, Cool! I can't wait to see your results. :)
TasteHongKong, The cream cheese taste isn't overbearing, it's just the right amount. Thanks. I'm also very fortunate to have them as supporters of my baking. ;D
This has me craving for Japanese-style cottony cheesecake! Must get some next time I go to the Asian bakery!
ReplyDeleteleaf, Going to those bakeries is always so fun! I love looking at the different types of products they have.
ReplyDelete