Sunday, March 27, 2011

Lemon and Matcha Marble Pound Cake and Award

I remember seeing this recipe for the first time and thinking, wow that's a lot of eggs! So, I halved the recipe and ended up with a short cake. It was very pretty and my brother rated it a 9. I reduced the sugar from 260 grams to 220 I didn't want to risk the texture, but I knew that Von's pound cake had less sugar so it would be fine. Next time, I will try further reducing the sugar.

This cake is relatively simple to make, you don't even need a mixer! I just did everything by hand. The texture was really nice. I didn't have humongous holes, maybe that's because hand mixing makes it harder to get holes.

But I tend to have a problem with marbling cakes! I don't marble them enough because I'm scared of mixing the batters into one shade of color. :/

Lemon and Matcha Marble Pound Cake

Photobucket

Photobucket

Photobucket

Tuesday, March 22, 2011

Rich and Sweet Berry Scones and Award

These scones are pretty fun to make because you can pretend that you're making puff pastry because of the folds you need to make. They weren't too sweet and sprinkling some sugar on the tops is a good idea. I did not brush the tops with butter because I felt that it was unnecessary, and I only topped one scone with sugar. The sugar topped scone was less prone to browning. It also made for a prettier scone. While I baked these scones, butter leaked out. I don't think that's supposed to happen, but I don't know what I did wrong. Anyway I hope you enjoy the recipe.

Also, this past week I received an award from Lena from Frozen Wings. I didn't get around to writing this post until now, but I would like to thank her for giving me my first award. It really means a lot with me and I would like to share it with several other bloggers. Please read more to find out who got the awards. Also, please check out Lena's blog; she has many beautiful bakes and delicious food. Thank you again Lena!

Rich and Sweet Berry Scones
Photobucket

Photobucket

Photobucket


Monday, March 14, 2011

Wheat Mantou II and Ham and Cheese Bread

I haven't felt like blogging recently, but I still bake a lot. So now I have lots of posts that I still need to write. Anyway....

I wanted to try replicating this Chinese supermarket's mantou because I really like their mantou's texture. It's soft and you can eat it layer by layer. I always love peeling off the mantou skin and eating that first before peeling off layers of the mantou and eating it bit by bit. Is that weird? :D So because I wanted soft, layered mantou, I tried making wheat mantou again by adapting the recipe I previously used.

Sorry the picture is a bit washed out.
Photobucket

Photobucket
My bread tin has some grooves, so the bread has these cool looking lines.
Photobucket

Tuesday, March 8, 2011

Purple Yam Mochi

My aunt made some more mochi one day and brought some over to my house and shared a few with my family. There's a twist, instead of using red bean paste, she used mashed purple yam for the filling. Because making red bean paste is very time consuming, she tried out this new method recommended by her friend. I think this new flavor tastes really good. It doesn't have the "feel" of red bean mochi, but if you are in a bind and crave mochi with sweet fillings, go ahead and try this out. So here is the mochi she made, along with the simple recipe.

For the quick and easy mochi recipe with a video tutorial, click here. Continue reading for the yam filling's recipe.

Purple Yam Mochi
Photobucket
The second one is yam too, but the lighting was a bit off. This one was rolled in dessicated coconut instead of potato starch.
Photobucket

Red Bean Mochi
Photobucket

Photobucket

Sunday, March 6, 2011

小 牛牌 Little Ribs

When I was little, my mom would cook this pretty often. However, now we only eat this once in a while. The ingredients below are estimates because my mom adds ingredients by eying the amount, not measuring like me. Hopefully, I will learn how to cook one day without measuring ingredients. Sorry, but I don't know the English name for this dish...so my translation may sound a bit weird.
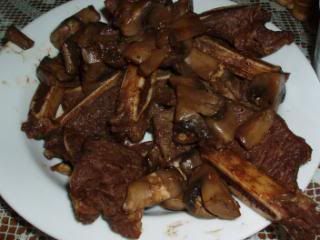
小牛牌 Little Ribs
Recipe from my mom
Photobucket
some ribs
BBQ sauce or black pepper sauce -2-3-4 tbsps
Soy sauce around 1 tbsp or more, depending on the amount of meat

Directions
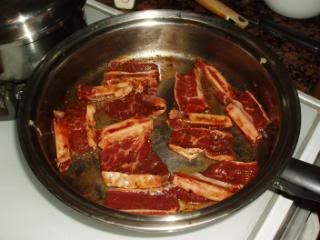
Cut ribs, get rid of the fat by peeling it off. If there is too much fat, cut it off with a knife.

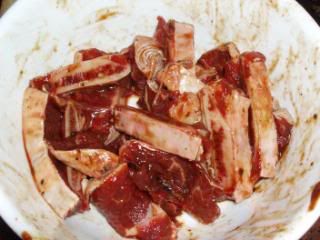
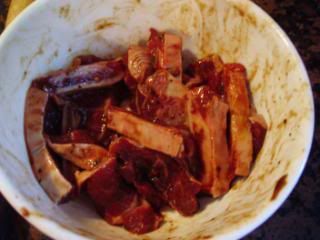
Marinate the ribs for around 30 minutes in the BBQ sauce or black pepper sauce. Use enough sauce to marinate all the meat.
Photobucket

Photobucket
When cooking it, no oil is needed for the pan because there will be a lot of fat coming out.

Add the meat to the pan by laying it on its side. Cook on medium heat for a few minutes so the meat won't become tough.
Cook on one side for a few minutes, then flip over to the other side.
Photobucket
Then cover the pan with the lid, checking from time to time to see when it is done on that one side. After it is done on that side, flip it over to continue cooking. This will only take a few minutes and then you're done!


The remaining sauce leftover from this dish is good for noodles. Just cook and drain the noodles, then mix the sauce with the noodles.

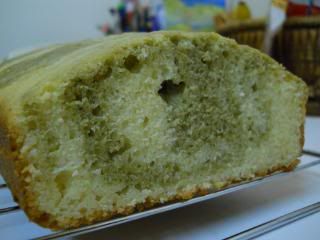
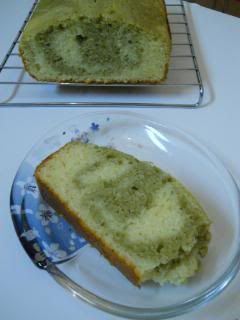
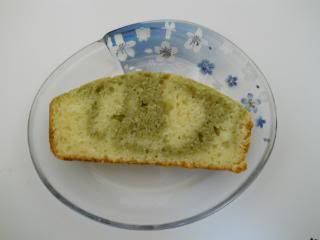
Btw, these pictures were taken with the old camera, before it died.

Tuesday, March 1, 2011

Sour Cream Pound Cake Take Two

Recently, I always want to revisit the old recipes that I have tried and wasn't 100% satisfied with the results. I want to remake several things in hopes that I will be successful. So one of the recipes I revisited was the sour cream pound cake by Von. The cake tasted delicious, but it did not look as delicious as Von's because mine had humongous holes in it.

So I tried it again, baking it in a 8x4 inch pan and I was extra careful to avoid over mixing the batter. I didn't over mix it terribly last time, but just enough so that I was left with big holes. This time, I succeeded! The holes definitely aren't as big as last time's.
Photobucket
After
Okay, fine there still are lots of holes, but the first time's were huge.
Photobucket
Before
Photobucket

Batter and lined pan.
Photobucket
I line my pan by tearing a rectangle sheet of parchment paper and then cutting 4 long slits so that I can place it in the pan.
Photobucket
Smoothed out batter.
Photobucket
Tada!
Photobucket

Now a time of suspense, time to check for holes.
Photobucket

LinkWithin

Related Posts with Thumbnails